Requirements
- PostgreSQL or MySQL server.
- Stripe account.
- Postmark account.
Step 1: Open the .NET solution
Open the NetcoreSaas.sln solution with Rider or Visual Studio.
There are 3 environment files on the backend:
- appSettings.json: Production
- appSettings.Development.json: Development
- appSettings.Testing.json: Testing
And 2 environment files on the frontend:
- .env.production
- .env.development
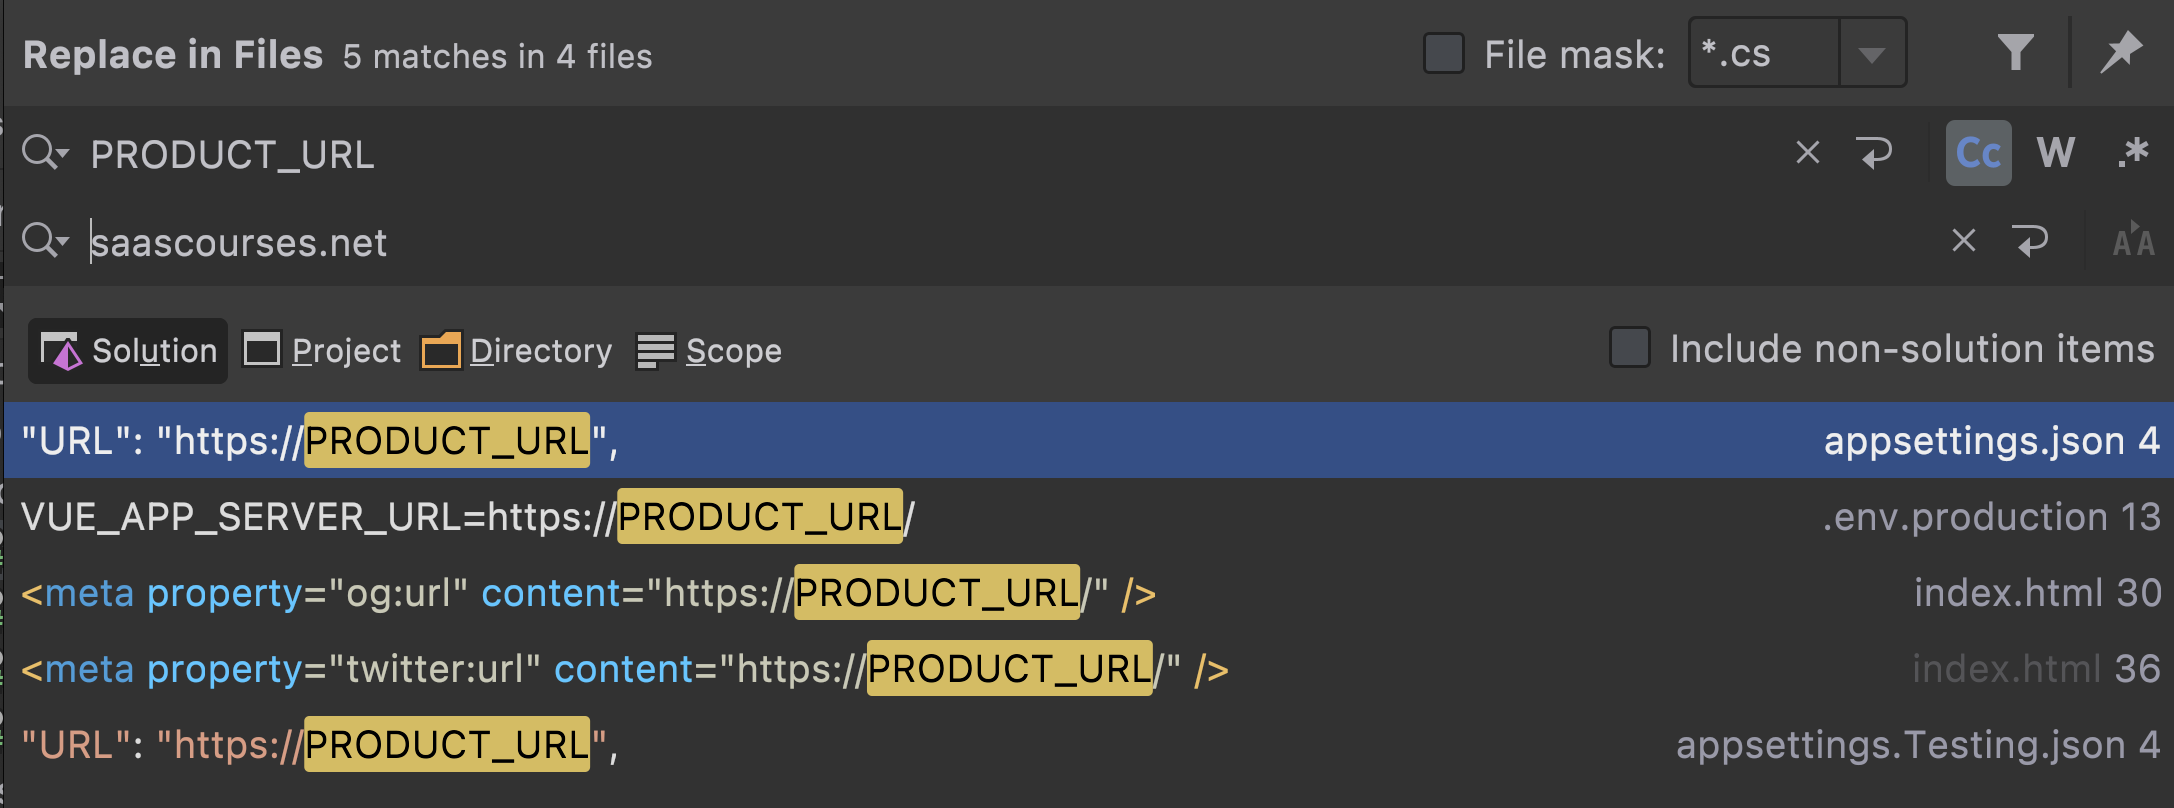
Step 2: Find and Replace Environment Variables
You need to Find and Replace the following values.
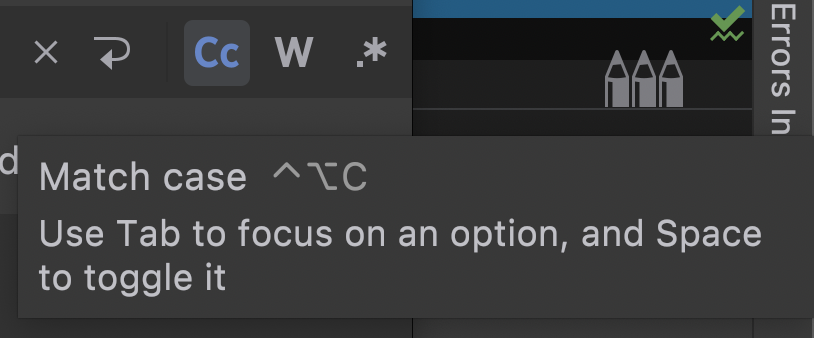
IMPORTANT: Use the ‘Match case’ find and replace option:
- PRODUCT_URL: Your SaaS URL (without https:// or slashes).
- PRODUCT_NAME: Your SaaS name.
- SUPPORT_EMAIL: e.g. admin@saasfrontends.com.
- COMPANY_NAME: Legal incorporation name.
- COMPANY_ADDRESS: Incorporation address.
- POSTMARK_SERVER_TOKEN: An UUID, get it here.
- POSTMARK_SENDER_NAME: e.g. Alex, get it here.
- POSTMARK_SENDER_EMAIL: e.g. hello@saasfrontends.com, get it here.
- Development environment:
- DEVELOPMENT_DATABASE_NAME: e.g. dev-db.
- DEVELOPMENT_SERVER: e.g. localhost.
- DEVELOPMENT_PORT: e.g. 5432.
- DEVELOPMENT_USER: e.g. testing.
- DEVELOPMENT_PASSWORD: e.g. password123.
- DEVELOPMENT_STRIPE_PUBLIC_KEY: get it here.
- DEVELOPMENT_STRIPE_SECRET_KEY: get it here.
- DEVELOPMENT_ADMIN_EMAIL: e.g. admin@saasfrontends.com.
- DEVELOPMENT_ADMIN_PASSWORD: e.g. password123.
- Testing environment:
- TESTING_DATABASE_NAME: e.g. tests-db.
- TESTING_SERVER
- TESTING_PORT
- TESTING_USER
- TESTING_PASSWORD
- TESTING_STRIPE_PUBLIC_KEY: get it here.
- TESTING_STRIPE_SECRET_KEY: get it here.
- Production environment:
- PRODUCTION_DATABASE_NAME: e.g. prod-db.
- PRODUCTION_SERVER
- PRODUCTION_PORT
- PRODUCTION_USER
- PRODUCTION_PASSWORD
- PRODUCTION_STRIPE_PUBLIC_KEY: get it here.
- PRODUCTION_STRIPE_SECRET_KEY: get it here.
- PRODUCTION_ADMIN_EMAIL
- PRODUCTION_ADMIN_PASSWORD
For example, if my website will be saascourses.net, I’ll replace PRODUCT_URL (using Match case):
Frontend Service Mode
Since we’ll be running the backend, open the .env.development file and set the …_APP_SERVICE variable to api.
Learn more about the Fake API feature.
# Options: api, sandbox
..._APP_SERVICE=api
...Step 3: Database Migrations
On the terminal and run the following commands.
Note: By default, it will take the Development environment (appsettings.Development.json).cd src/NetcoreSaas.WebApi
dotnet ef migrations add Initial --context MasterDbContextExpected output:
Build started...
Build succeeded.
Done. To undo this action, use 'ef migrations remove'
Then apply the migration to the database:
dotnet ef database update --context MasterDbContextSince the Startup.cs class runs the migration twice (for multi-tenancy purposes), you can ignore the following error.
...
42P07: relation "AuditLogs" already exists
Verify that the database was created.
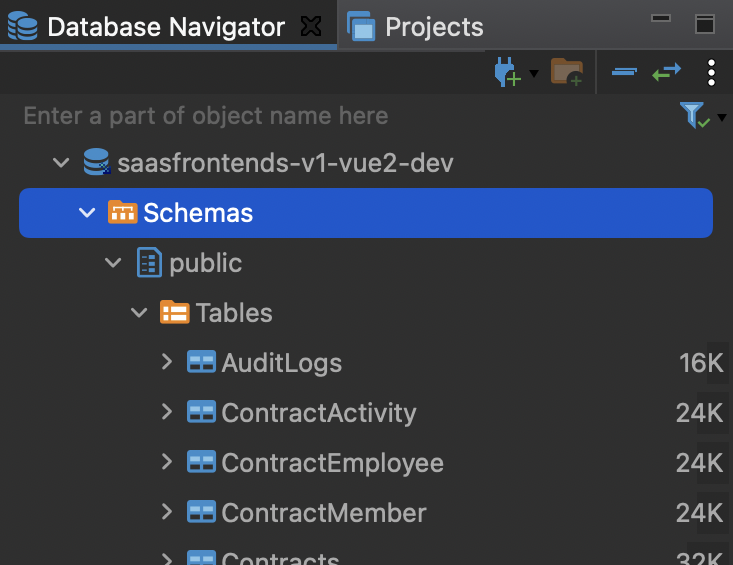 Note: The previous image is the DBeaver application connected to a local PostgreSQL server.
Step 4: Debug the app on Rider or VS
Select the NetcoreSaas.WebApi: NetcoreSaas configuration and Debug the app.

The Web API + Client app will launch at port 5000.
Step 5: Run the Frontend on VS Code
For Vue2 projects:
npm install
npm run serve
For Vue3, React and Svelte projects:
npm install
npm run dev
And open http://localhost:8080.

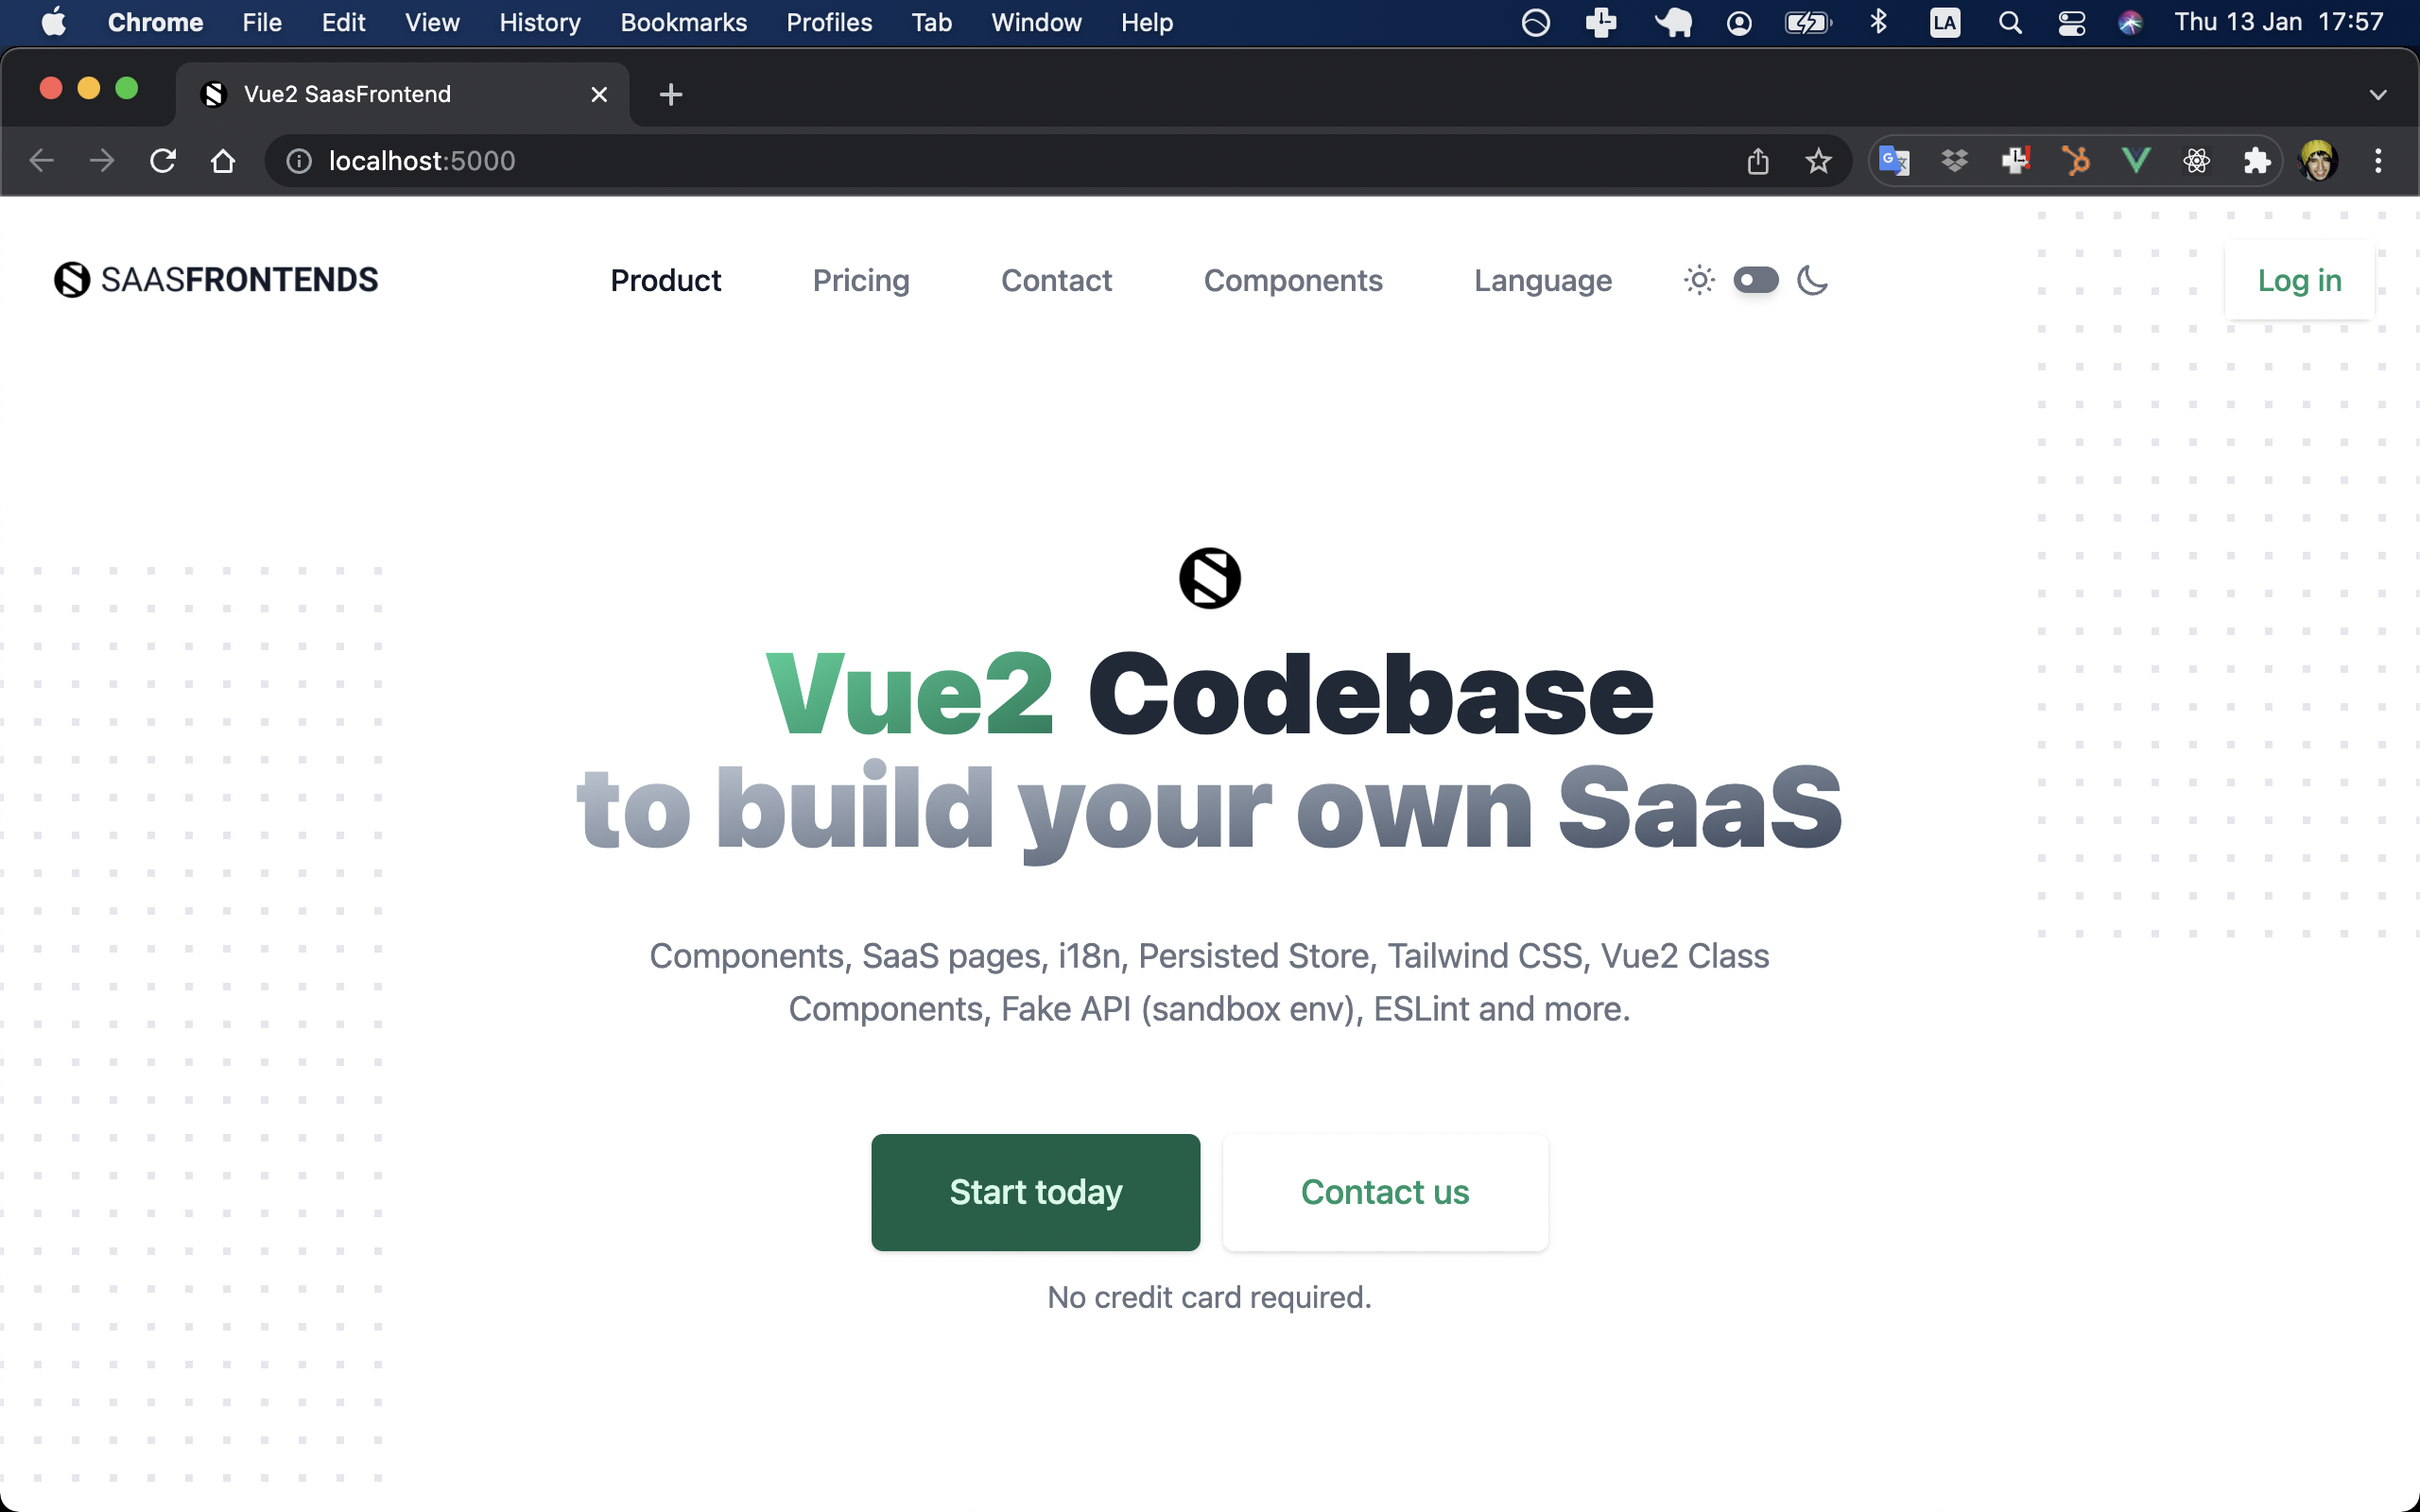
Step 6: Set up your pricing
Pricing plans
Preview
Open the /pricing URL and take a look at the default pricing:
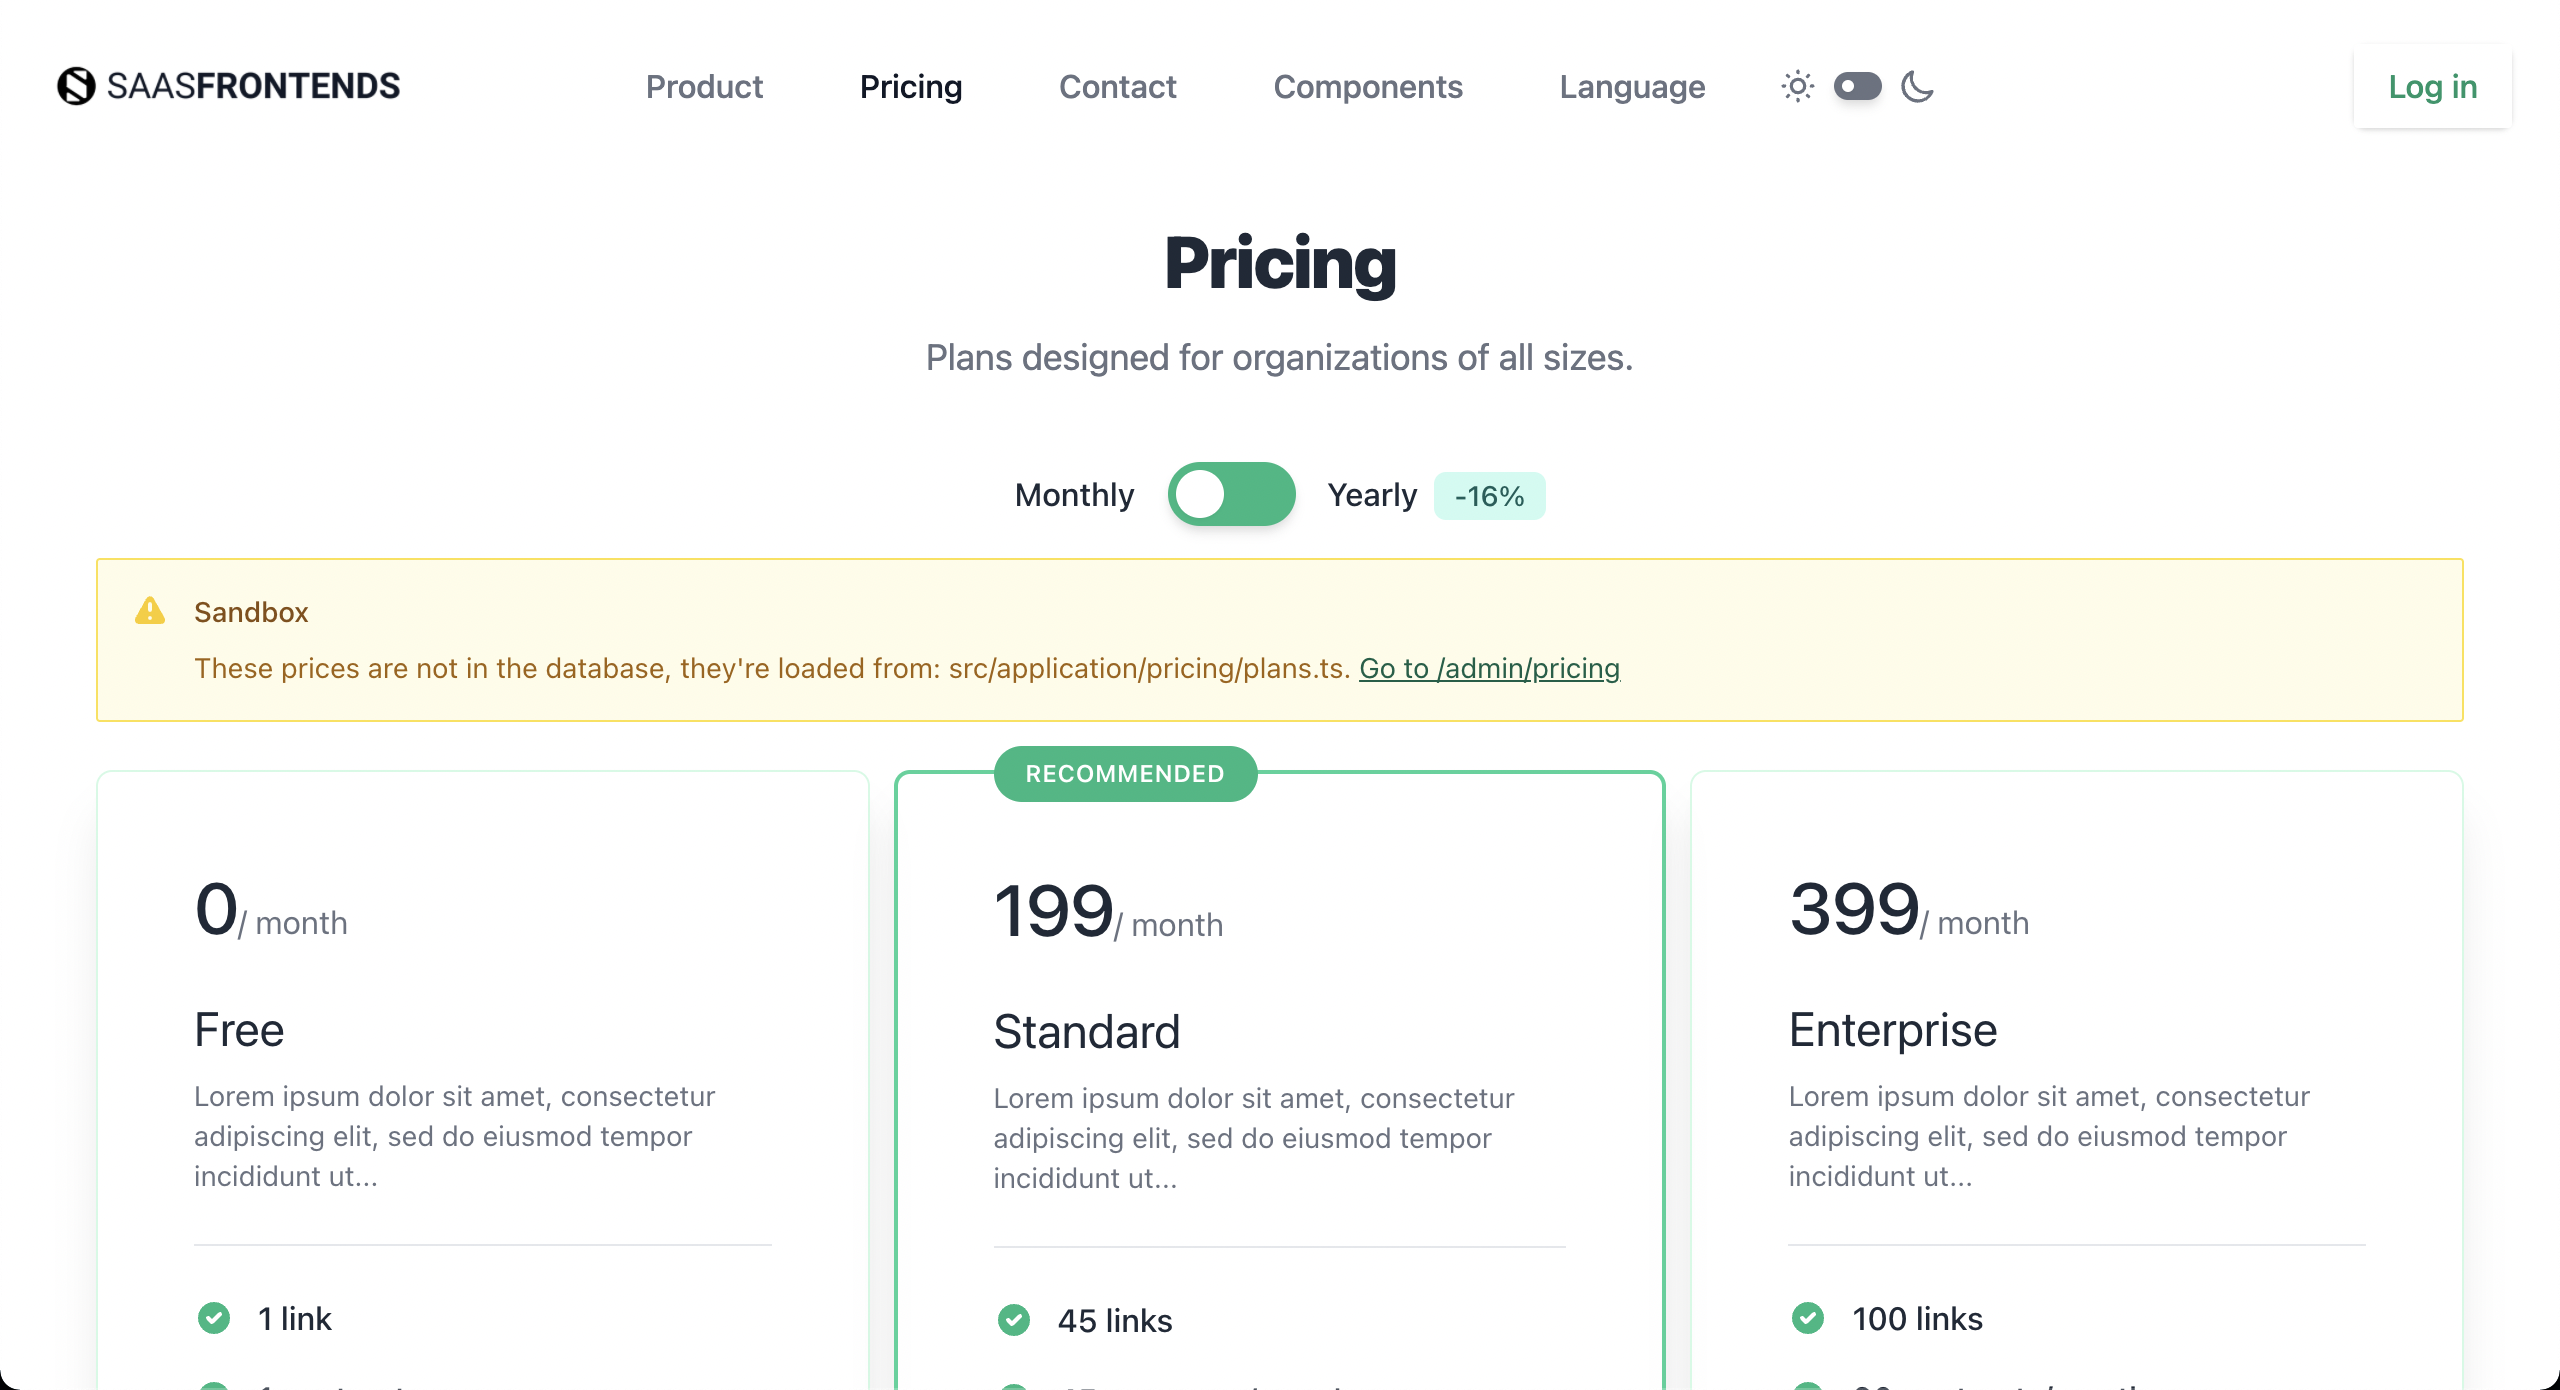
The warning banner is just telling you that these prices are yet to be created on the Database and Stripe.

Open the frontend src/application/plans.ts file and update the prices as you see fit.
Save Pricing
Once you’re happy with your pricing, log in as your admin user (remember your DEVELOPMENT_ADMIN_EMAIL and DEVELOPMENT_ADMIN_PASSWORD values) and go to /admin/pricing.
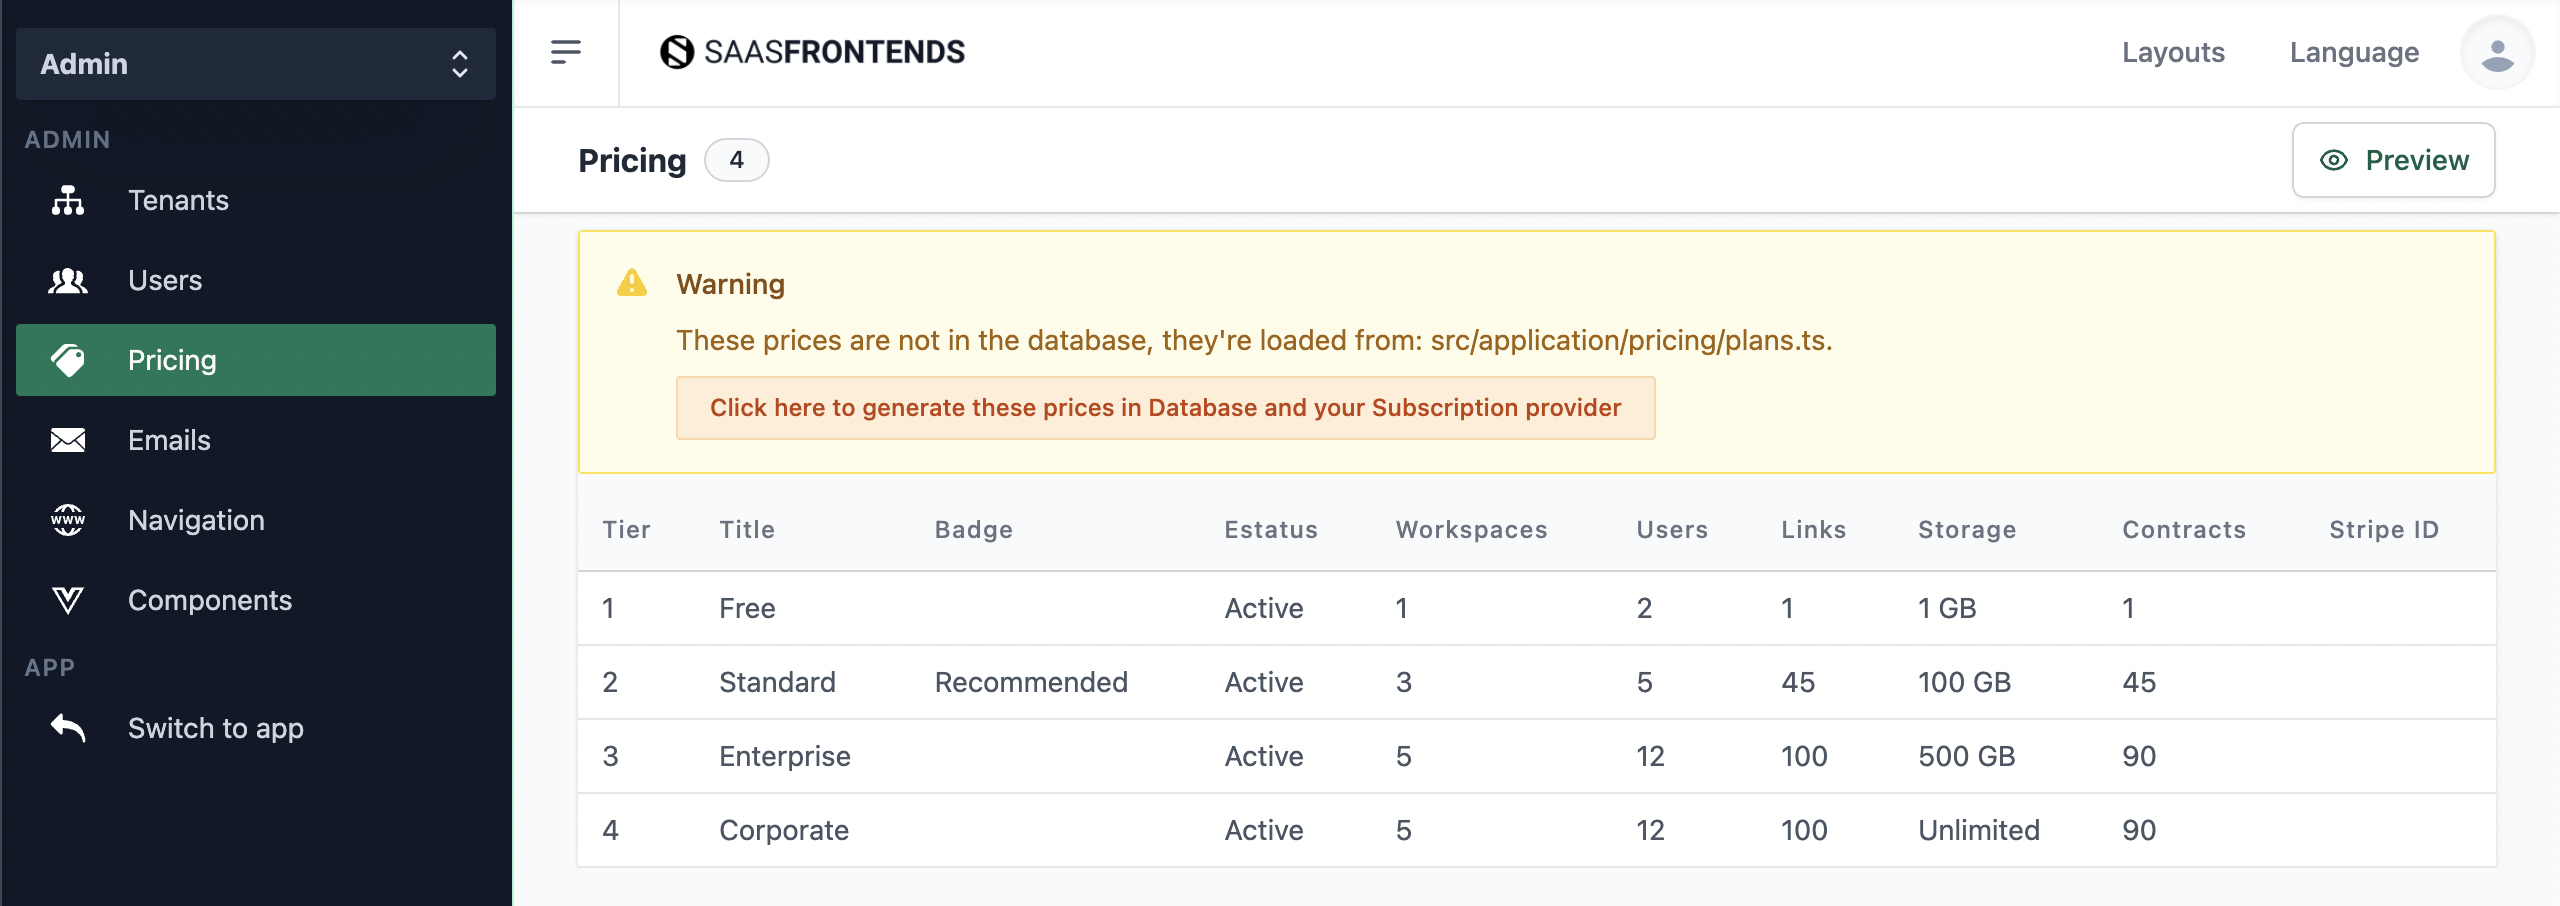
Click on the button “Click here to generate these prices in Database and your Subscription provider” and wait a few seconds.
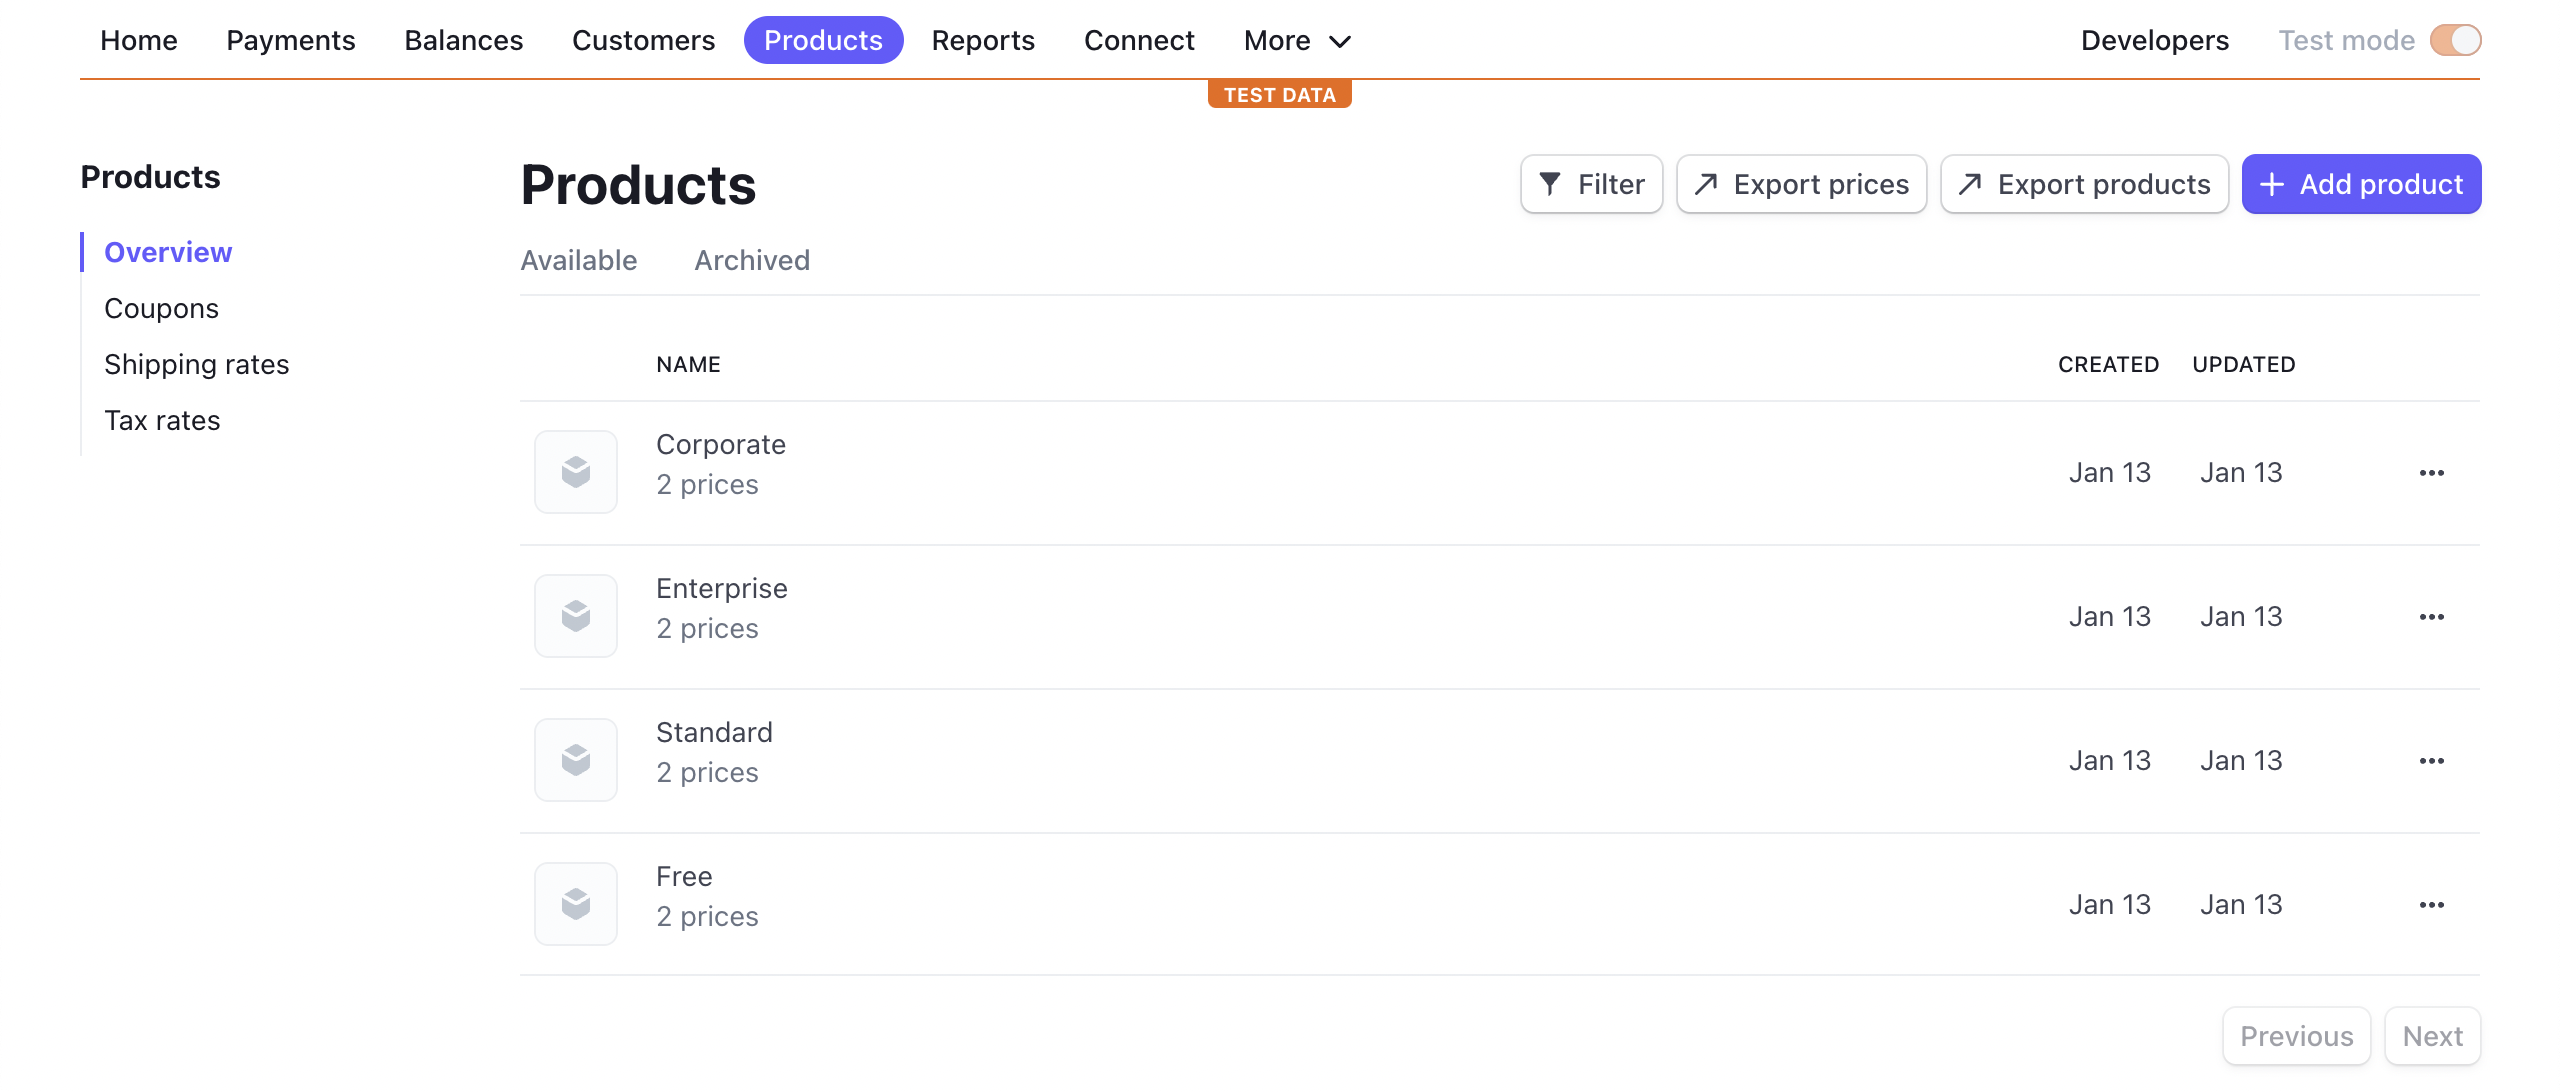
Verify your Stripe Dashboard
Open the Stripe dashboard and verify that the subscription products were created.
Verify your Database
Run an SQL query to verify that your products were persited to your database.
select * from "SubscriptionProducts";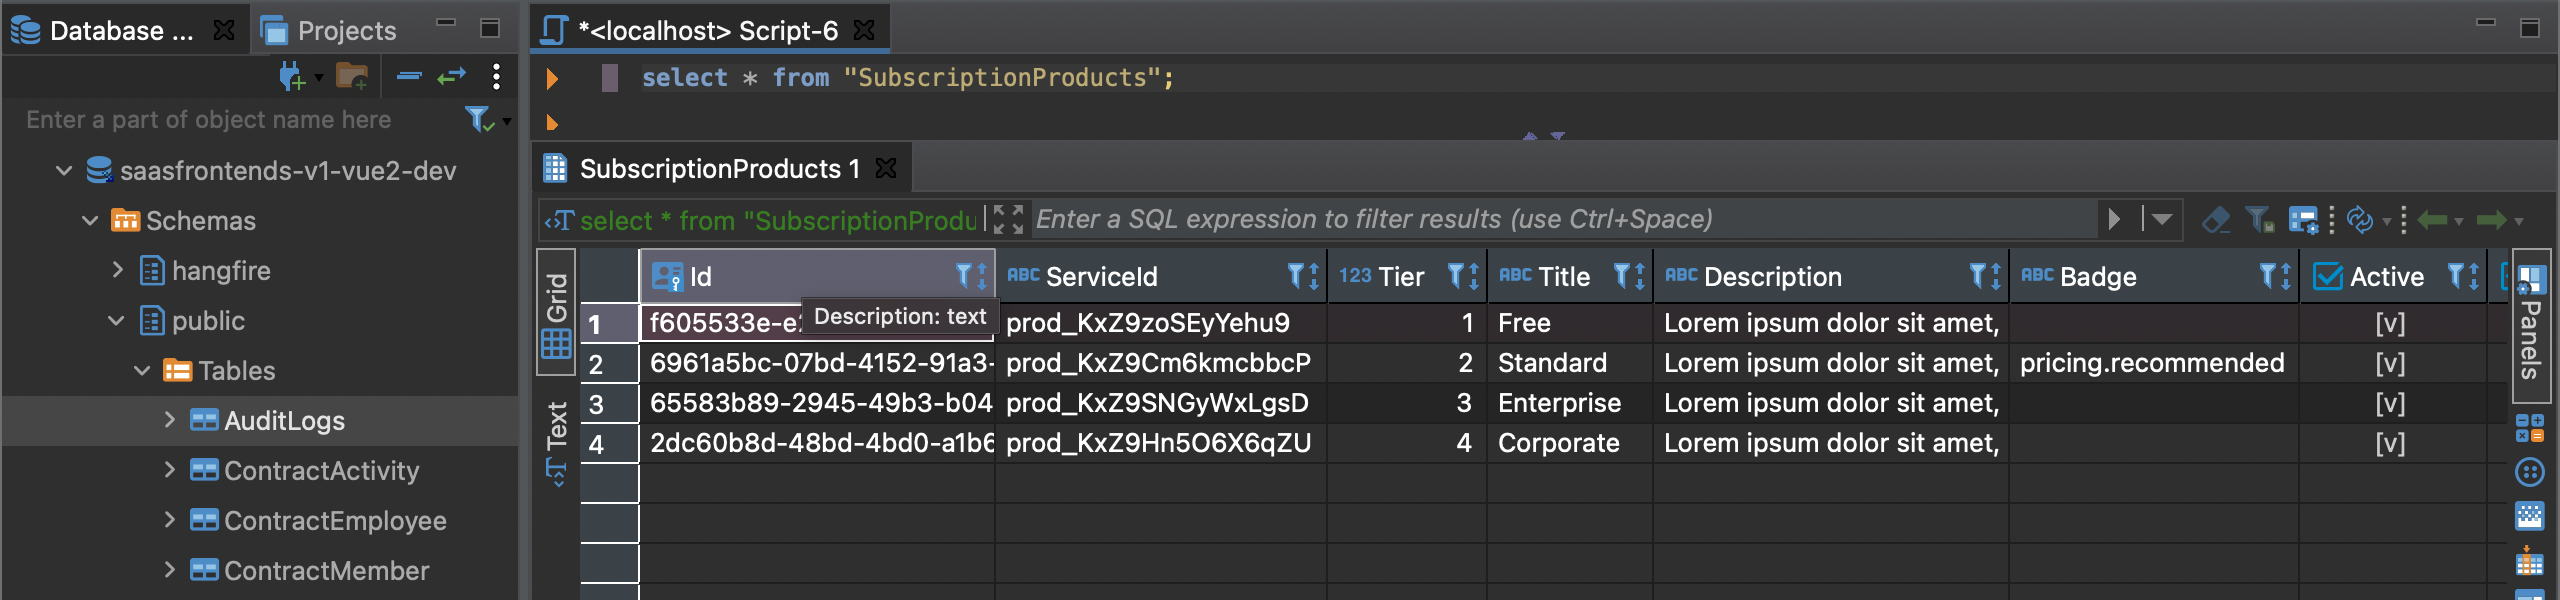
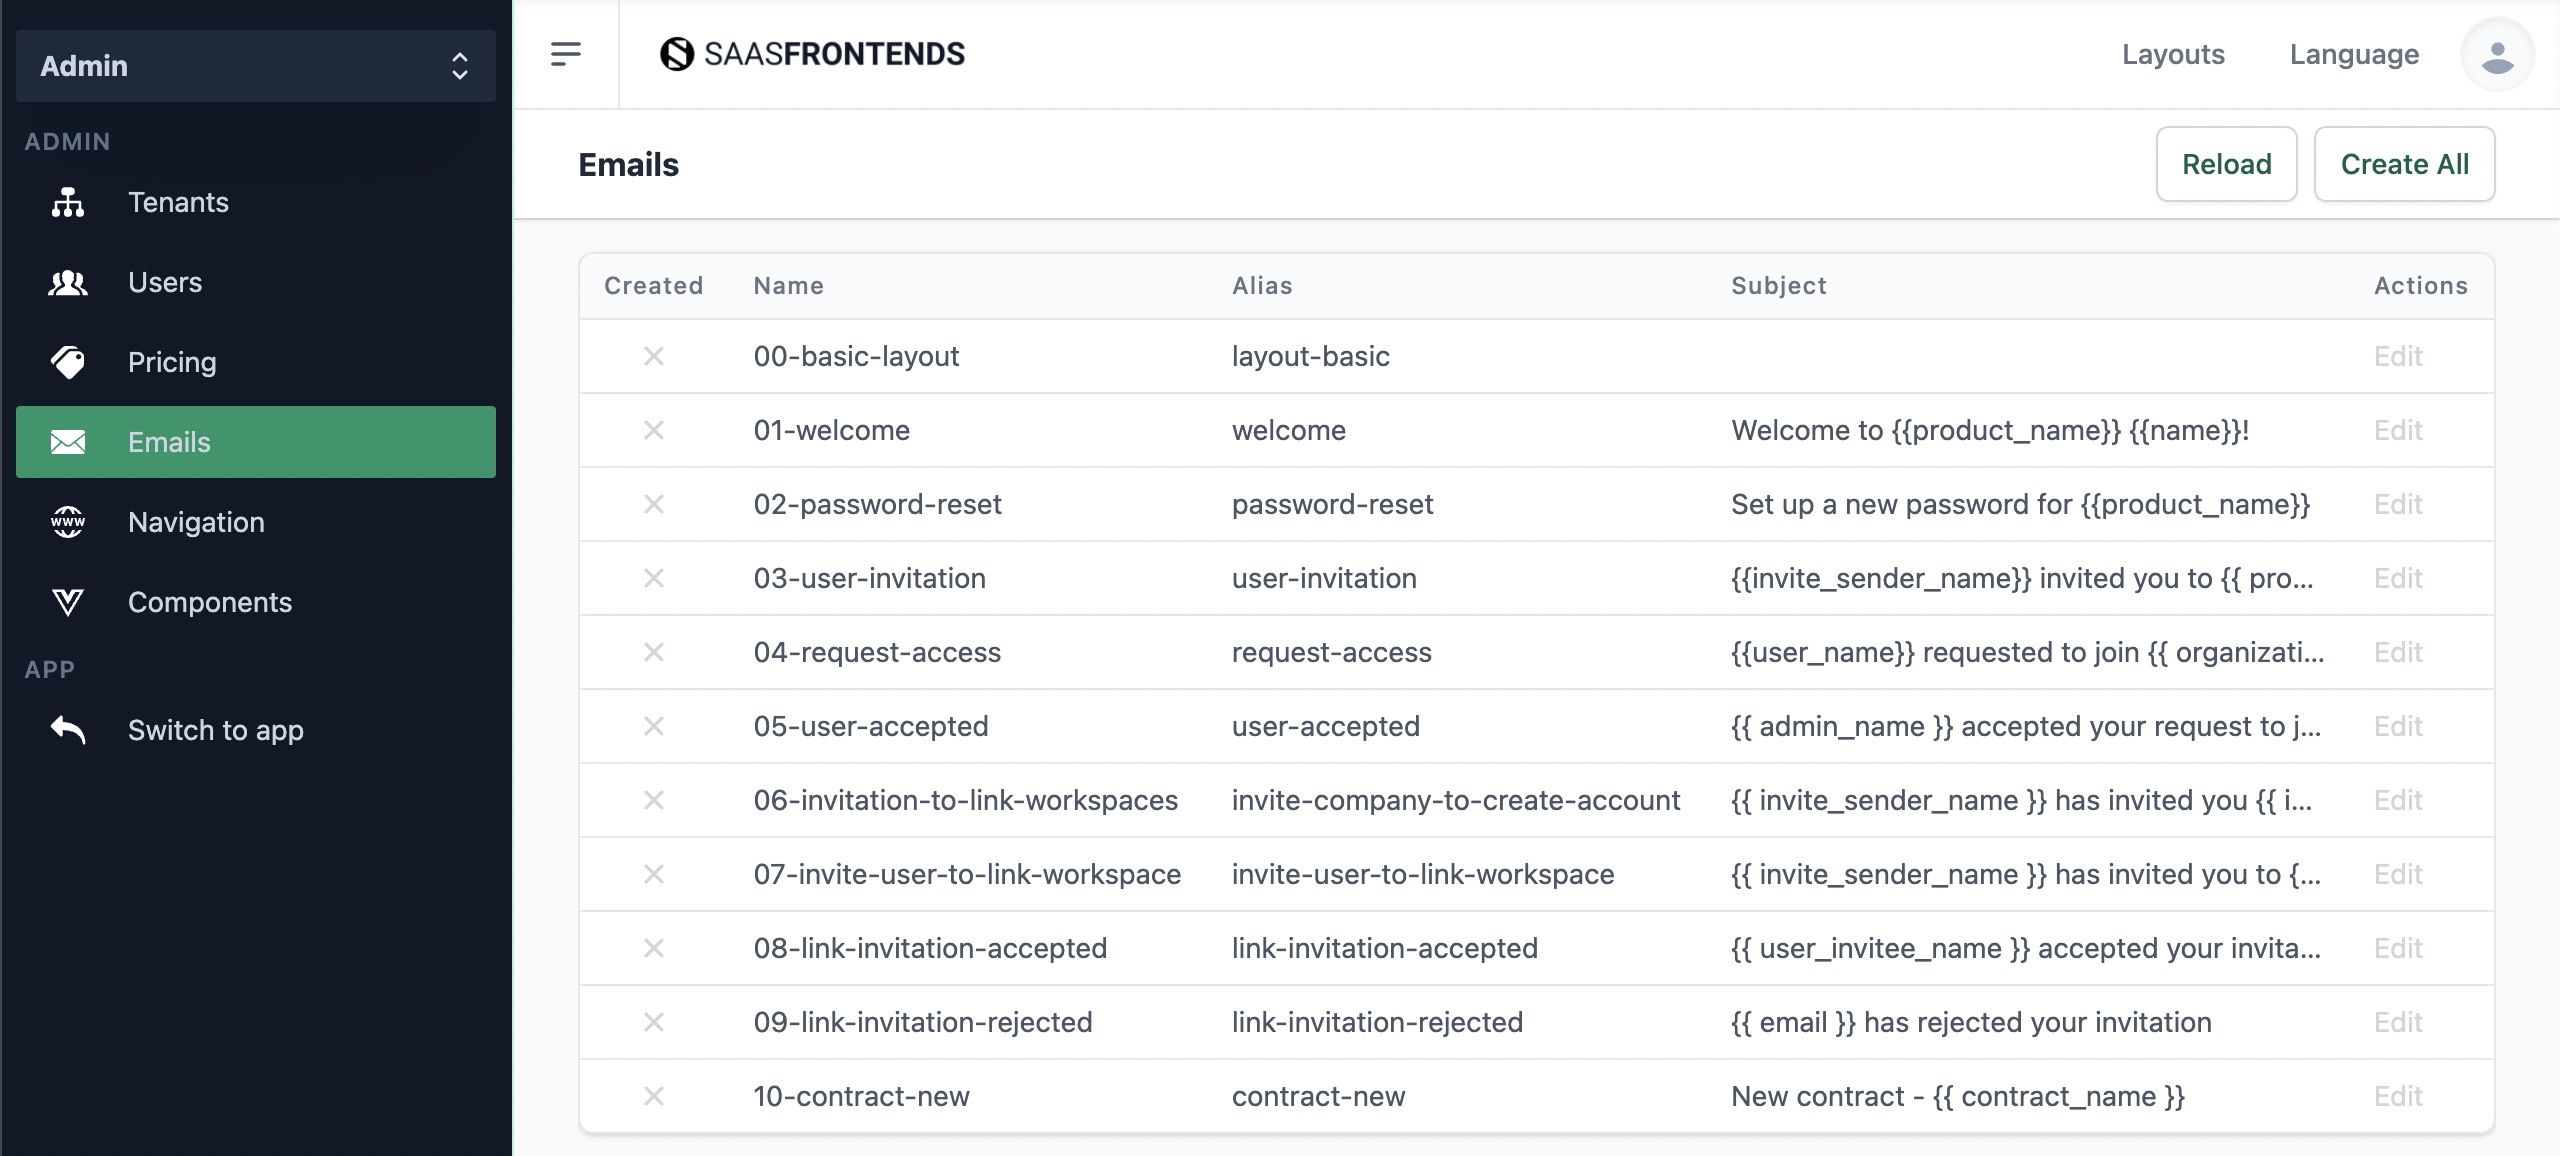
Step 7: Set up Email Templates
Go to /admin/emails and take a look at the default templates:
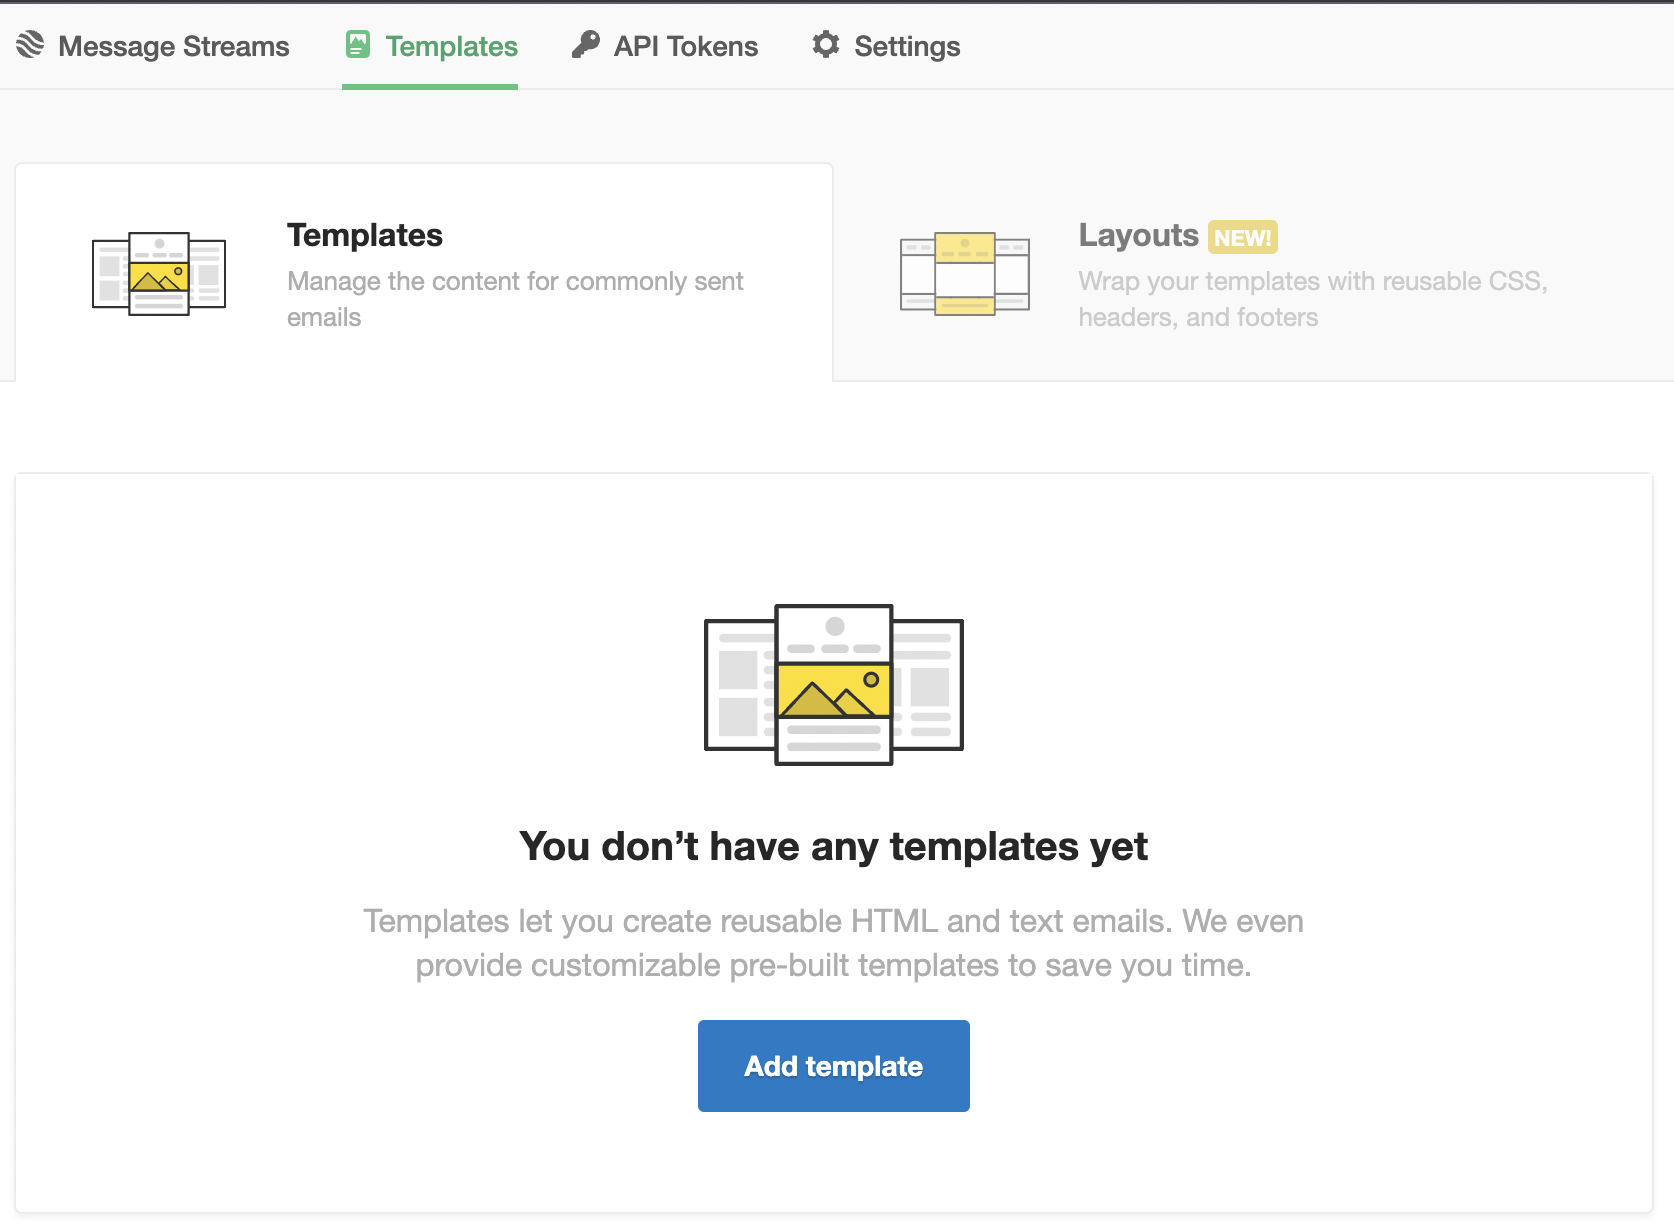
If you check your postmark server templates dashboard, it should be empty:
You can learn more about Postmark email templates here.
Creating the Postmark Templates
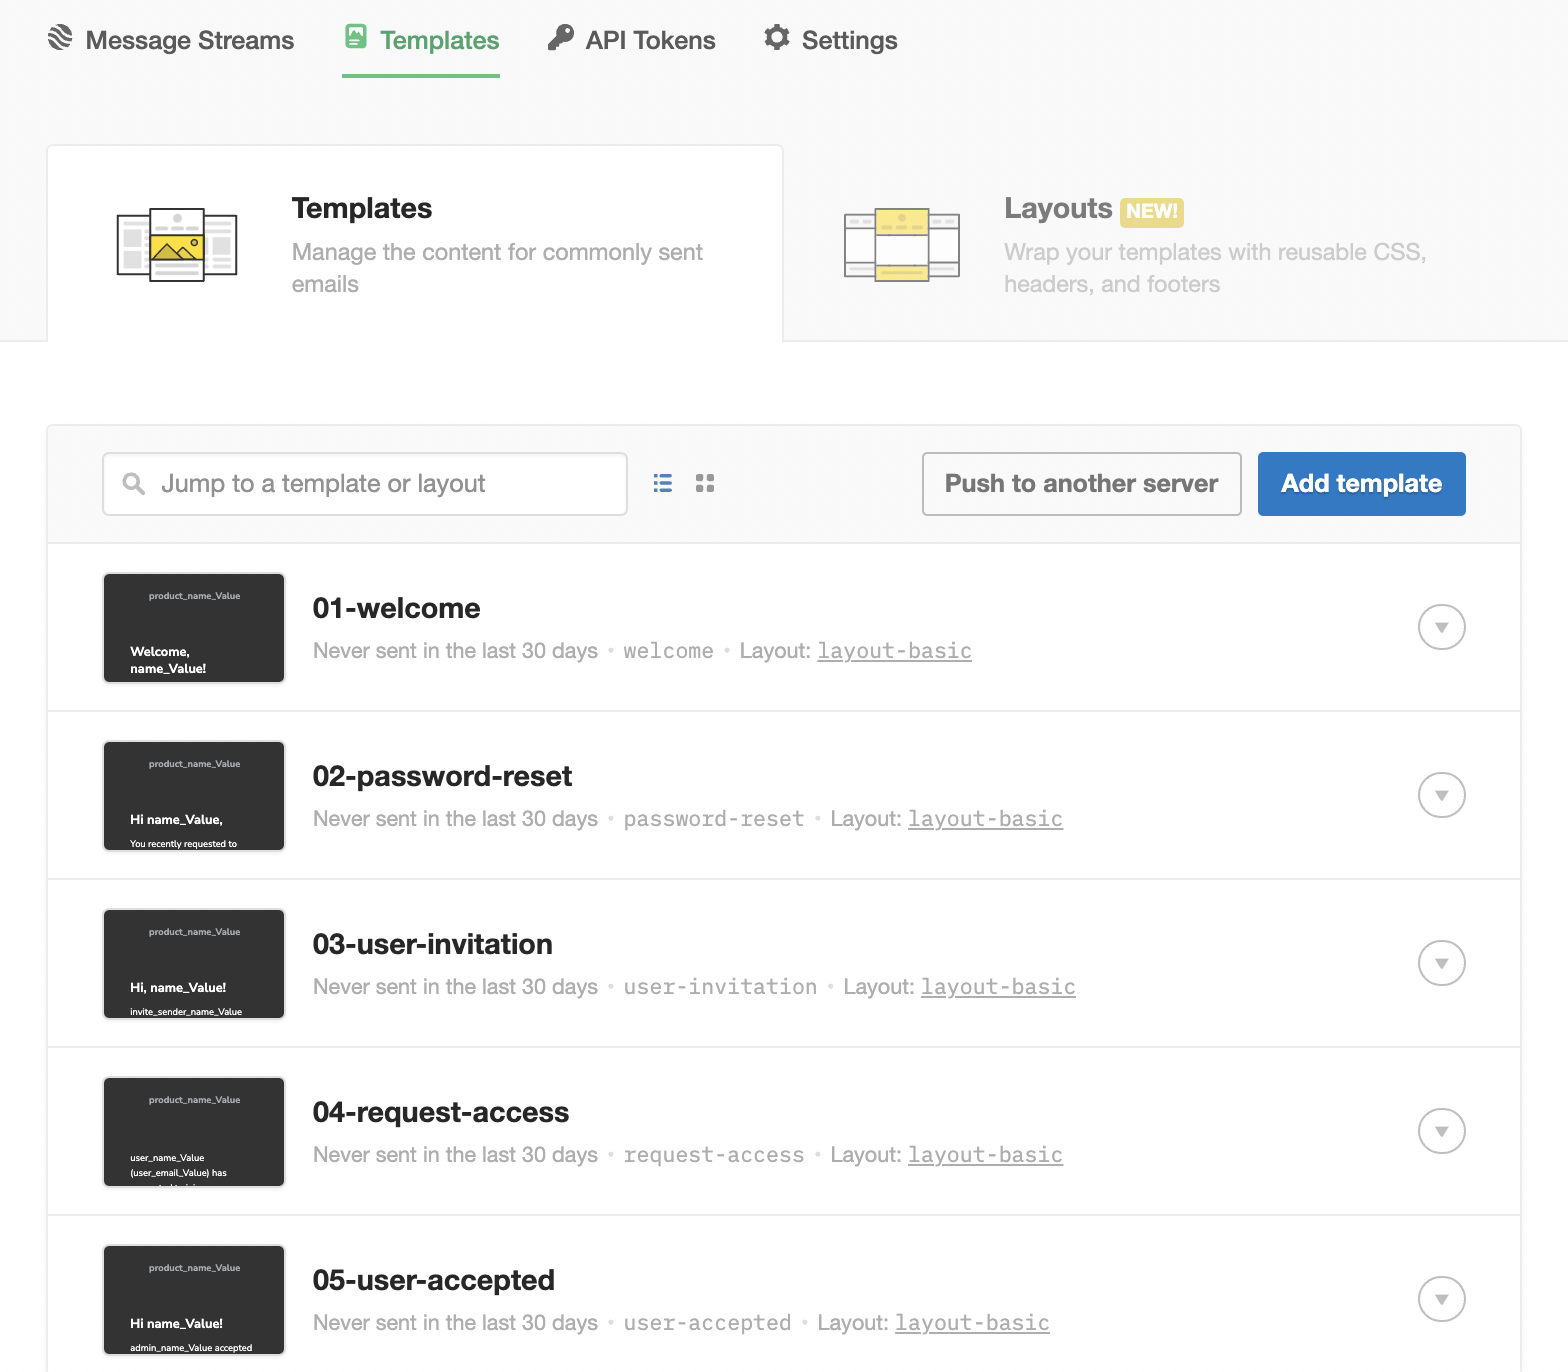
We need to create them by clicking on the “Create All” button and wait a few seconds.
Once the process is done, check your postmark server again, there should be 10 templates:
Step 8: Create an account
Register
Log out, go to the /pricing page and select a plan to register as a new user/tenant.
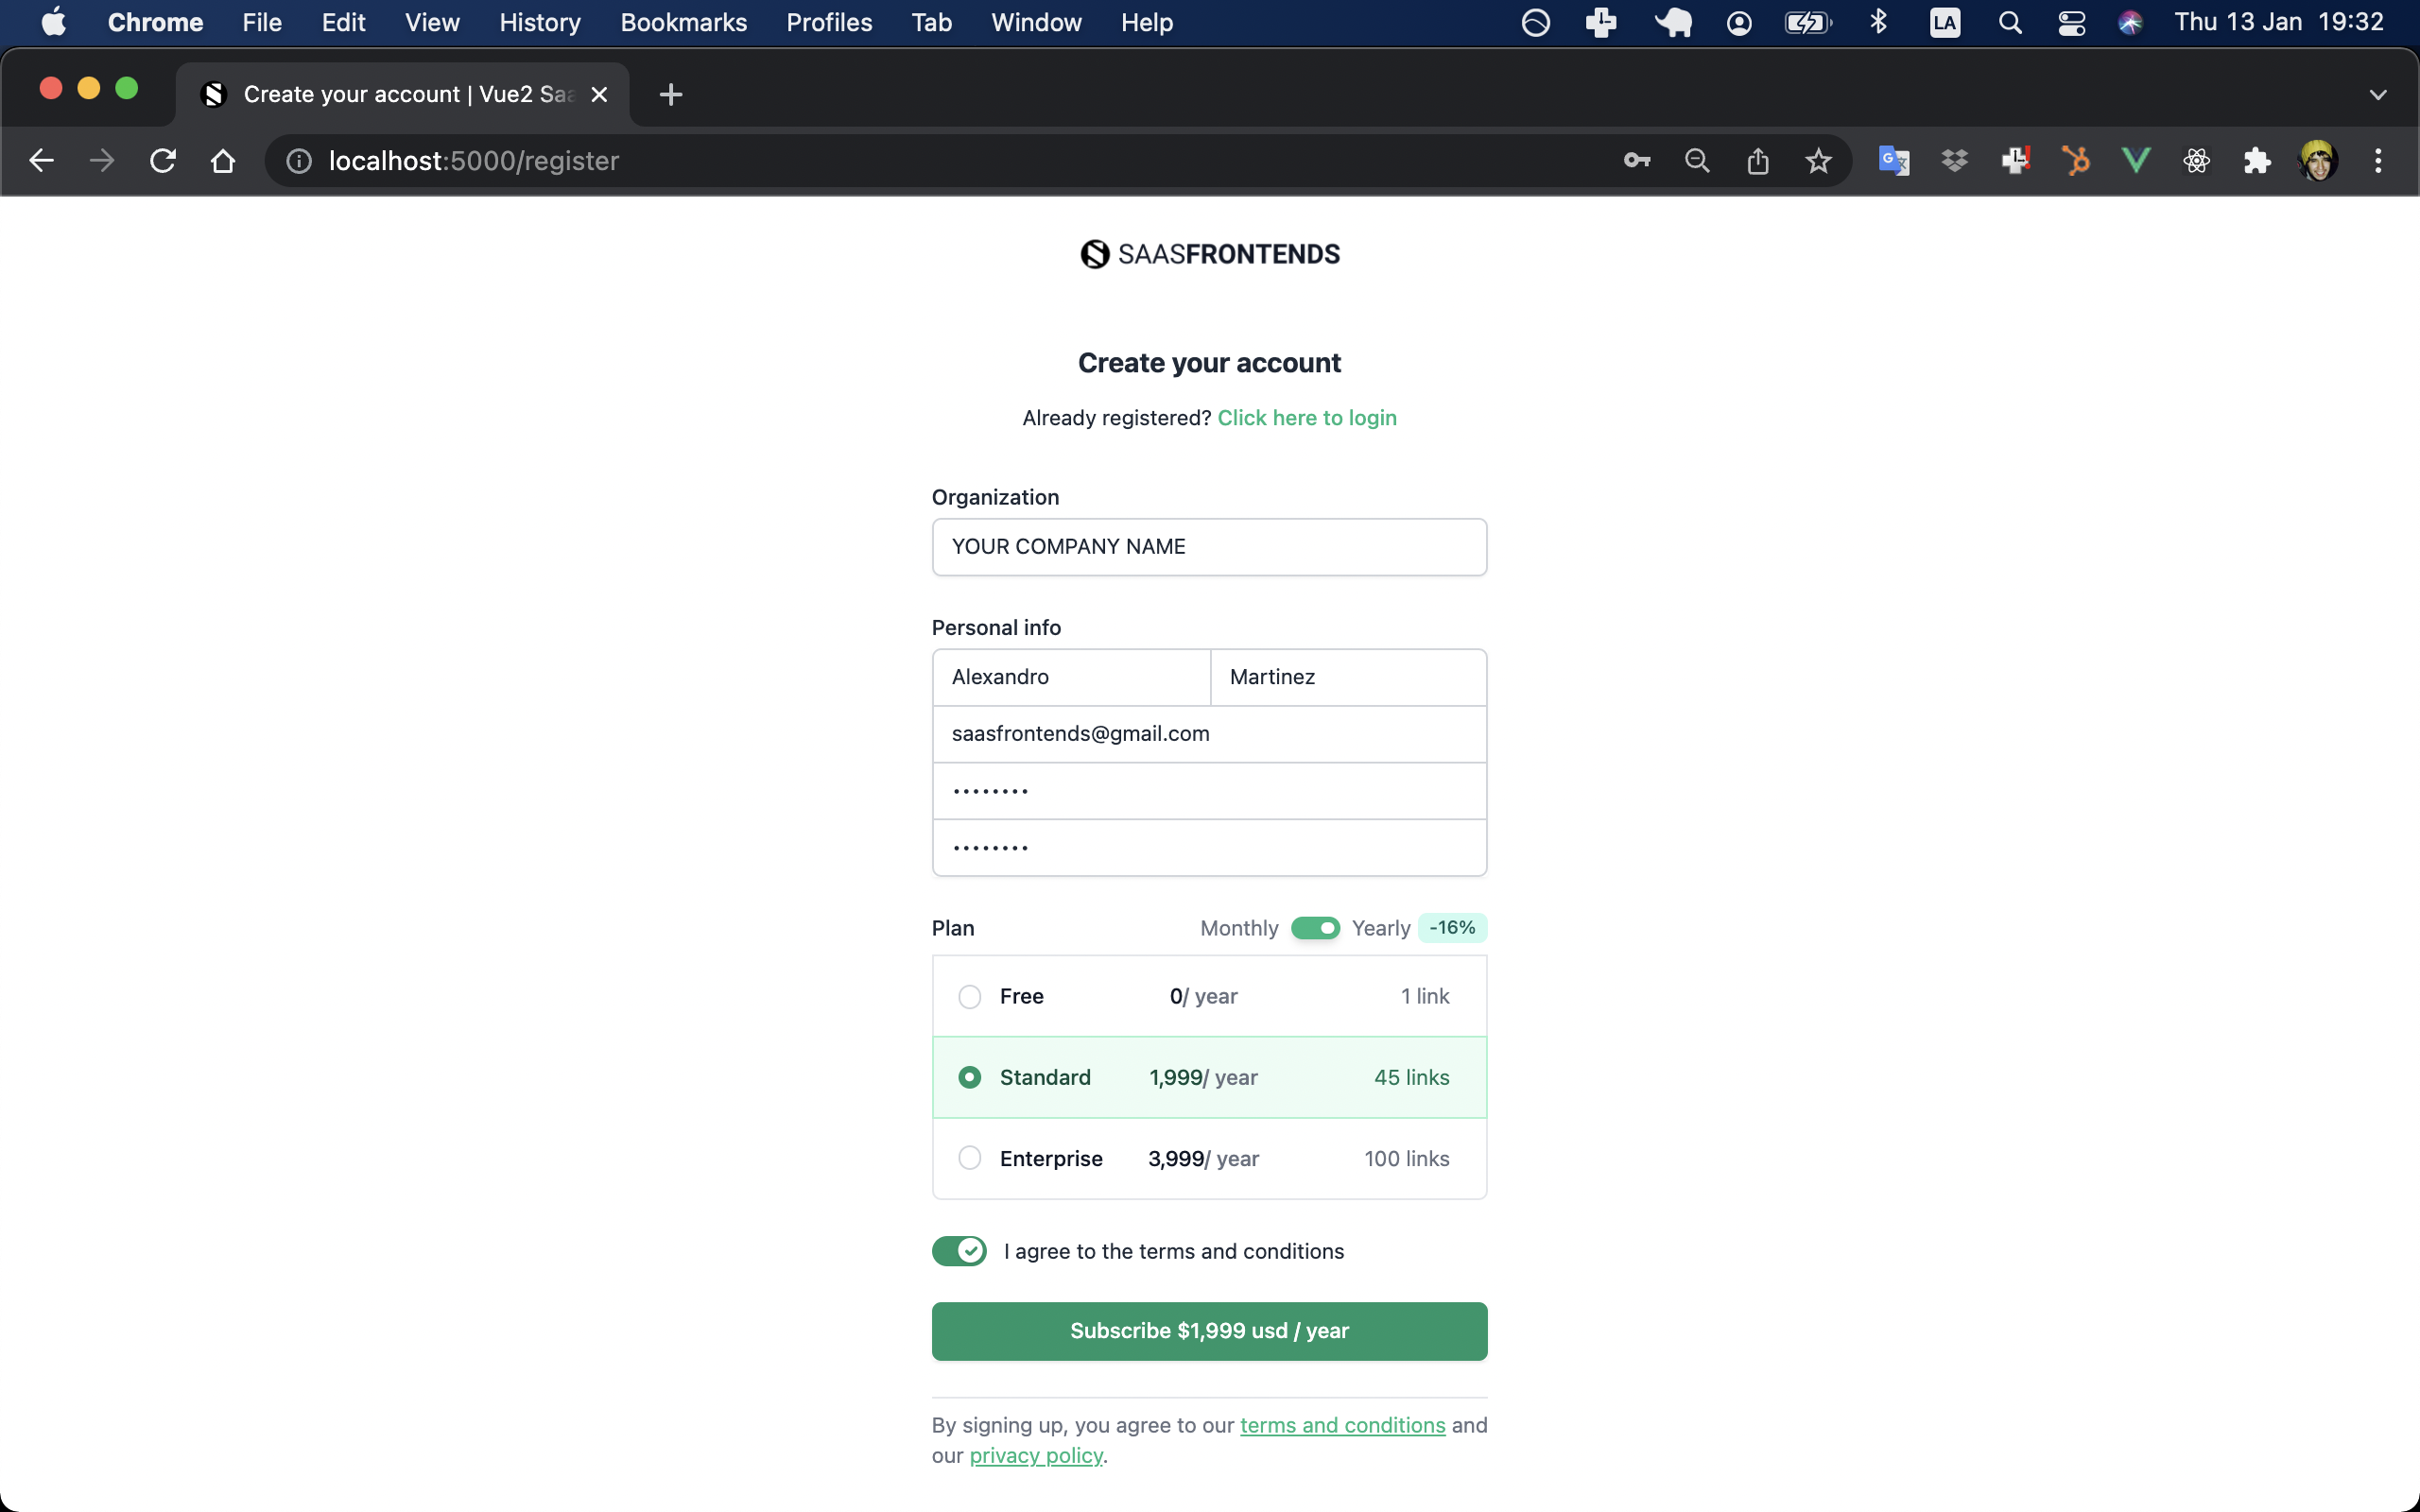
As you can see, I’ve selected a paid (yearly) plan, so it will ask for my payment info:
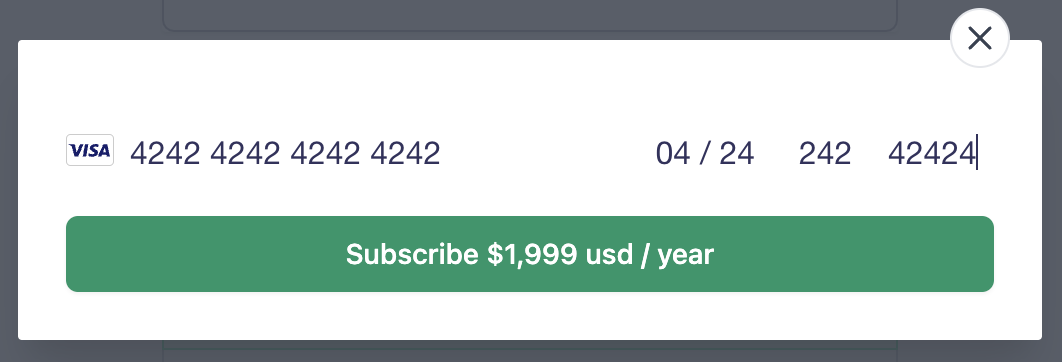
You can only use a testing card, learn more about it here, I’m using:
- Card number: 4242 4242 4242 4242.
- MM / YY: 04 / 24.
- CVC: 242.
- ZIP: 42424.
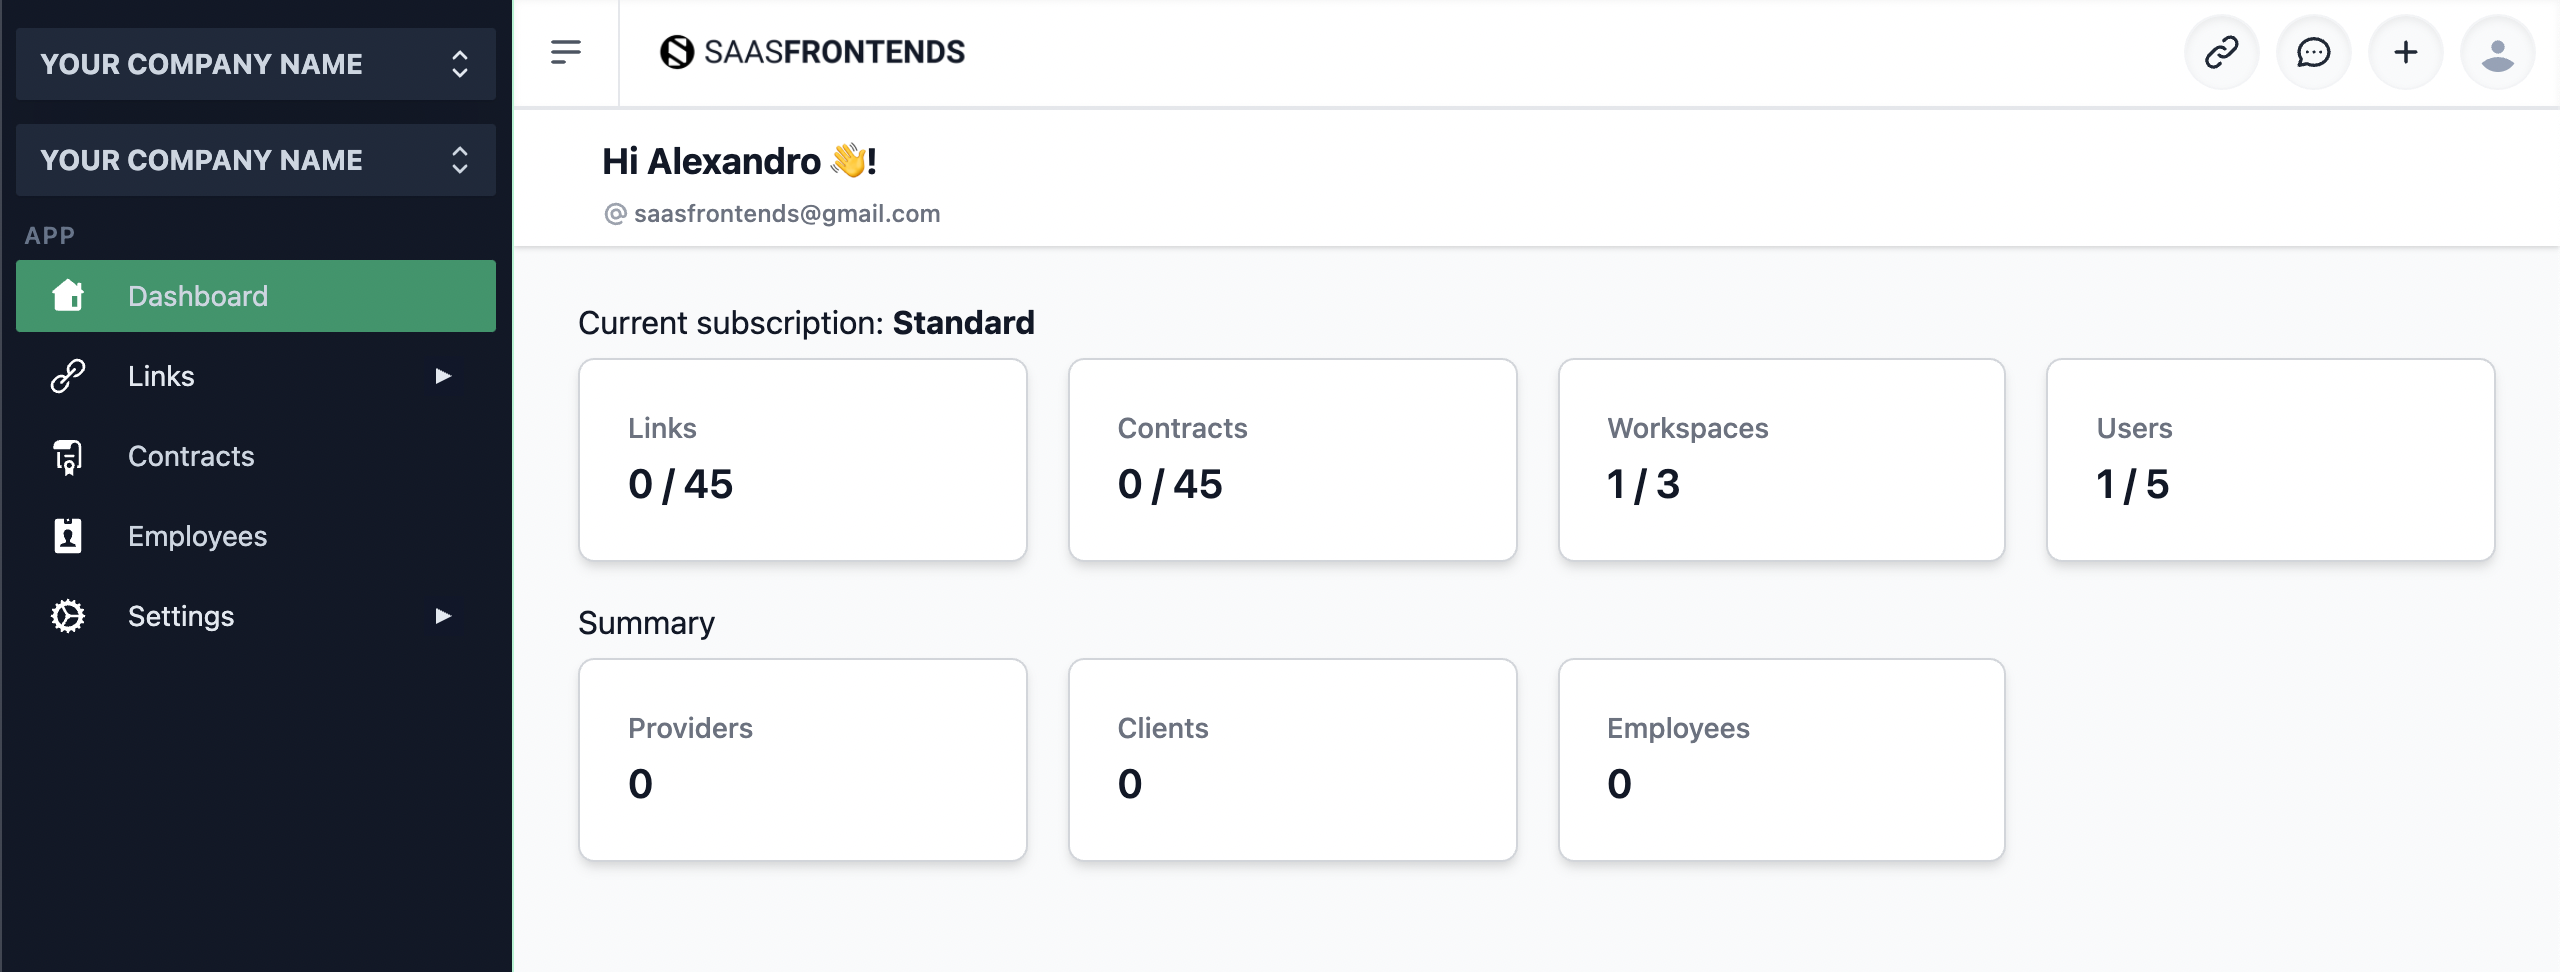
Dashboard
It should redirect you to the /app/dashboard:
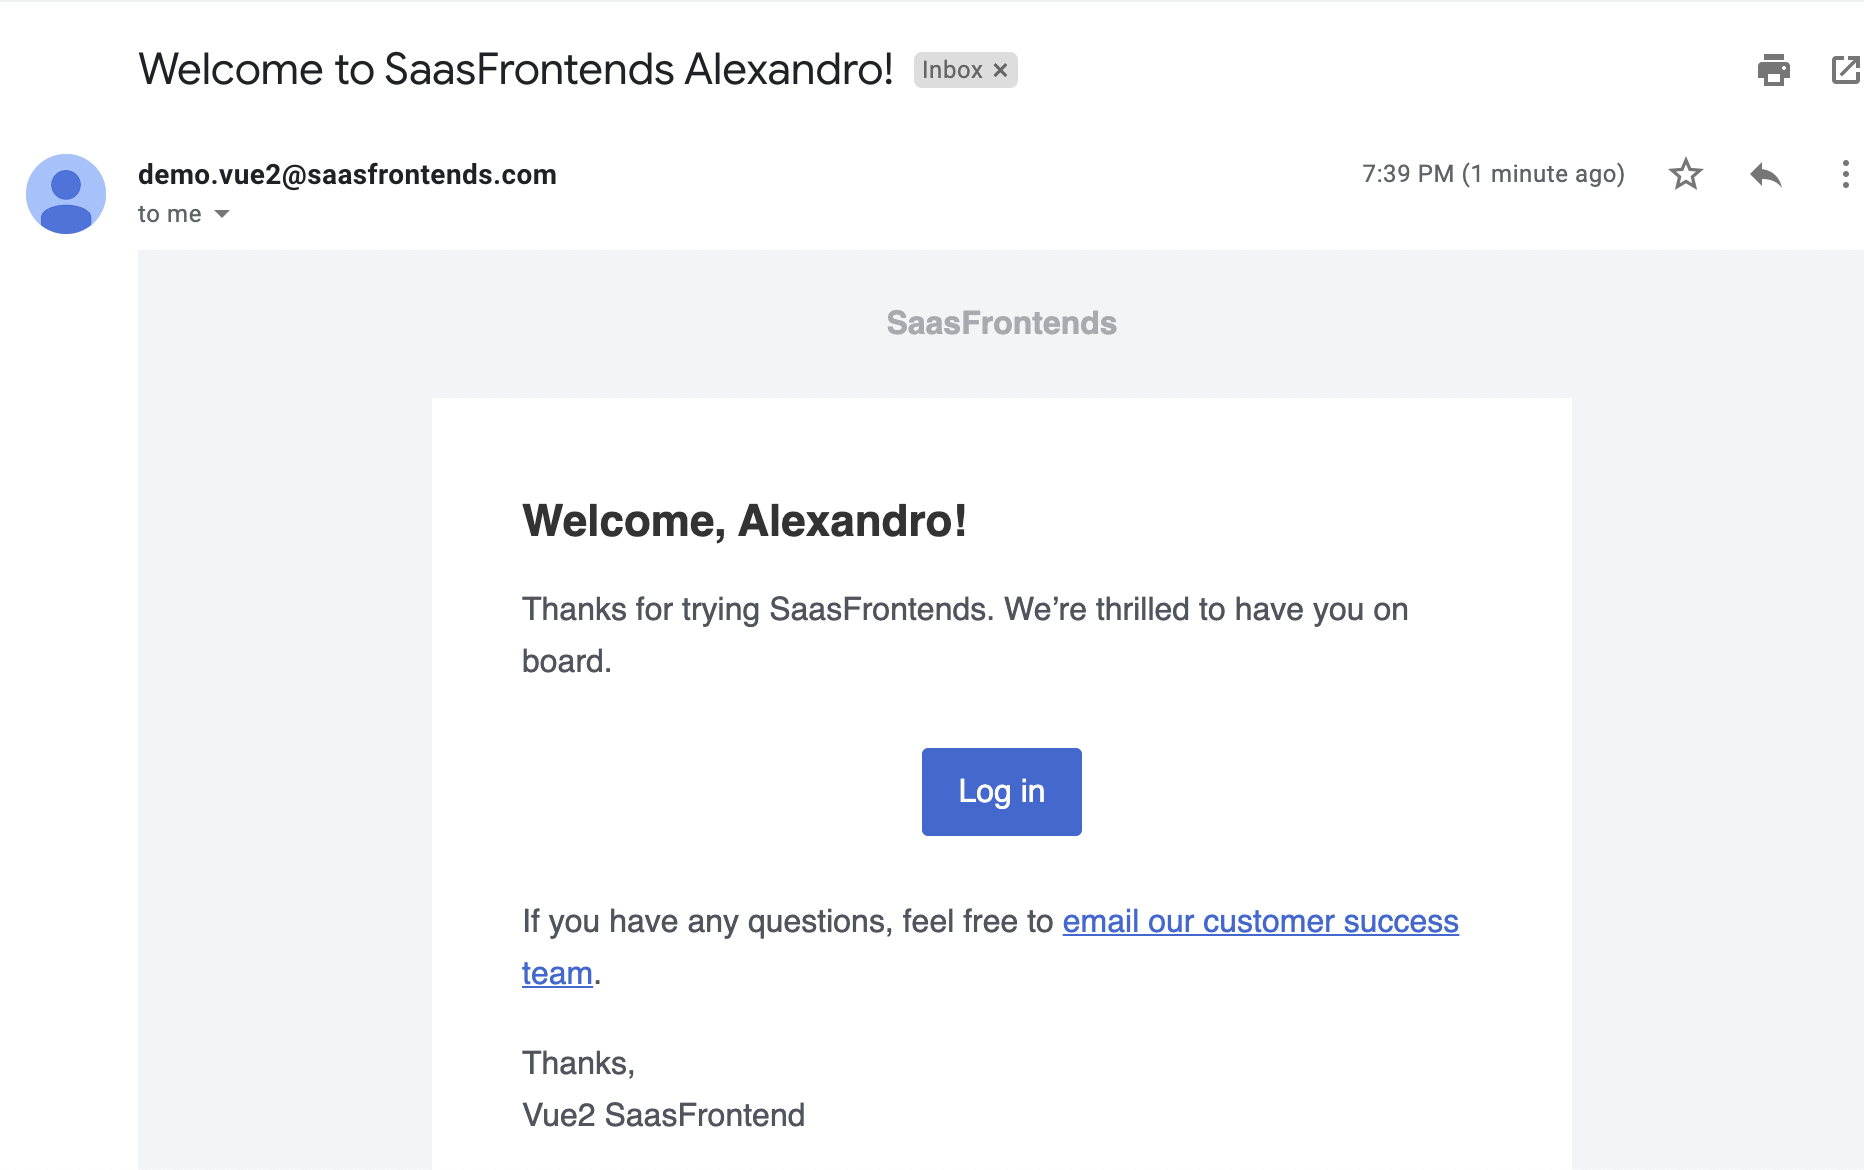
Welcome Email
Verify that you got the welcome email:
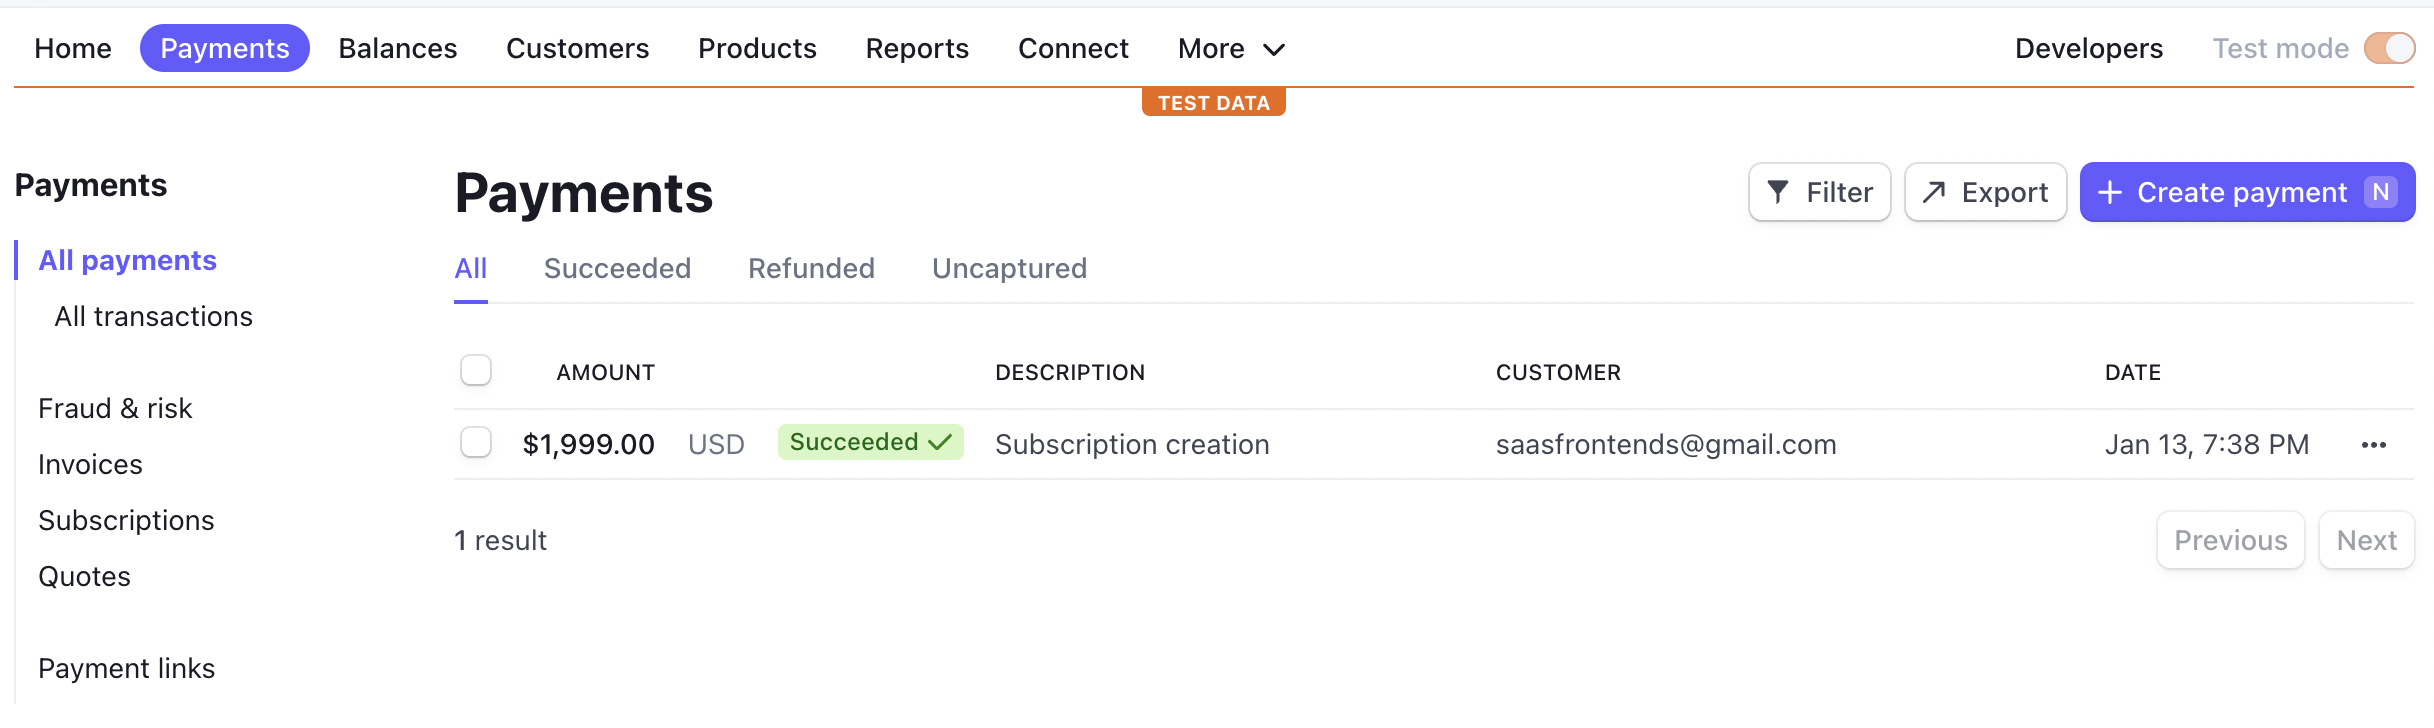
Stripe Payment
Verify that the payment is on your Stripe dashboard:
Step 9: Test the App
Now we’re ready to test the sample app.
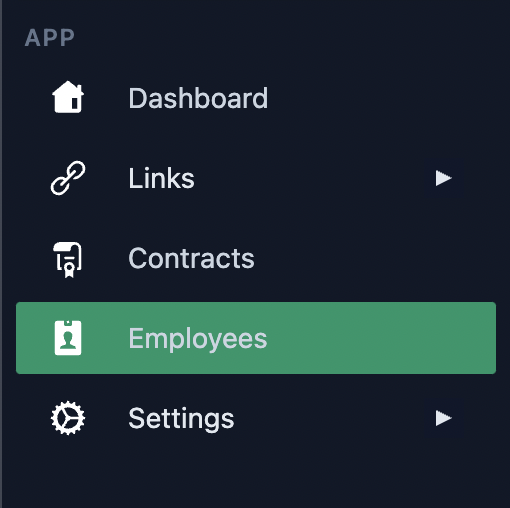
Employees
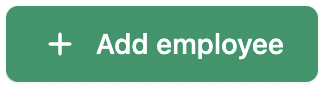
Create an employee by clicking the Employees sidebar item, and “Add employee” button:
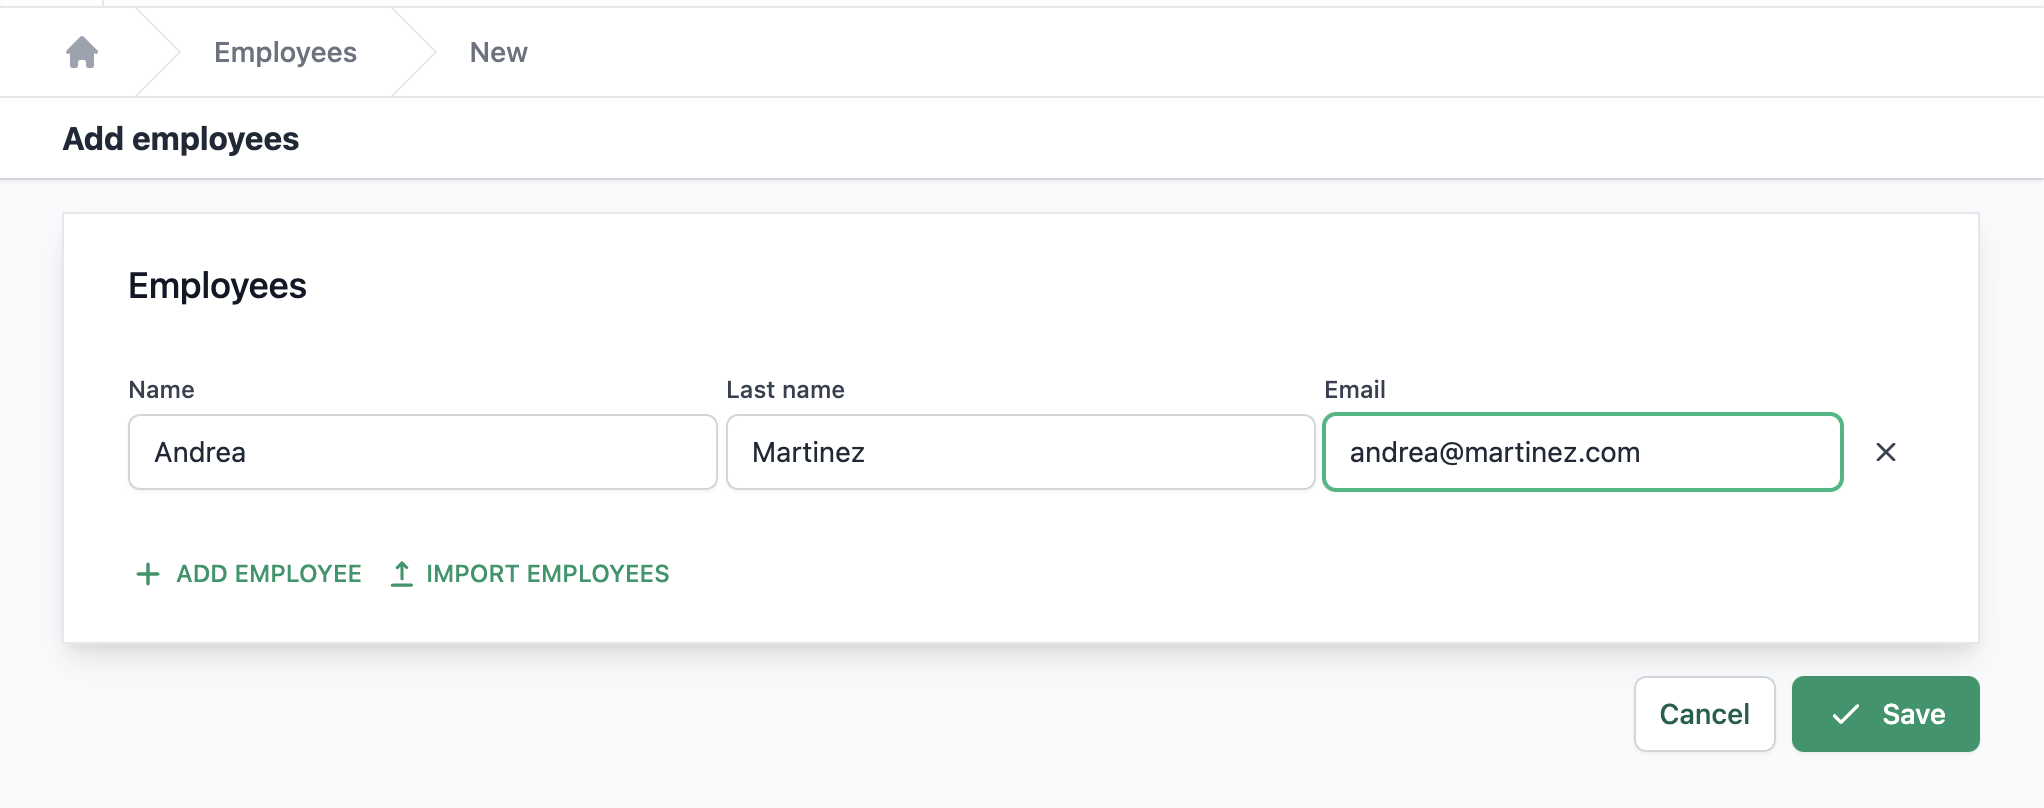
It will redirect you to the employees list page:
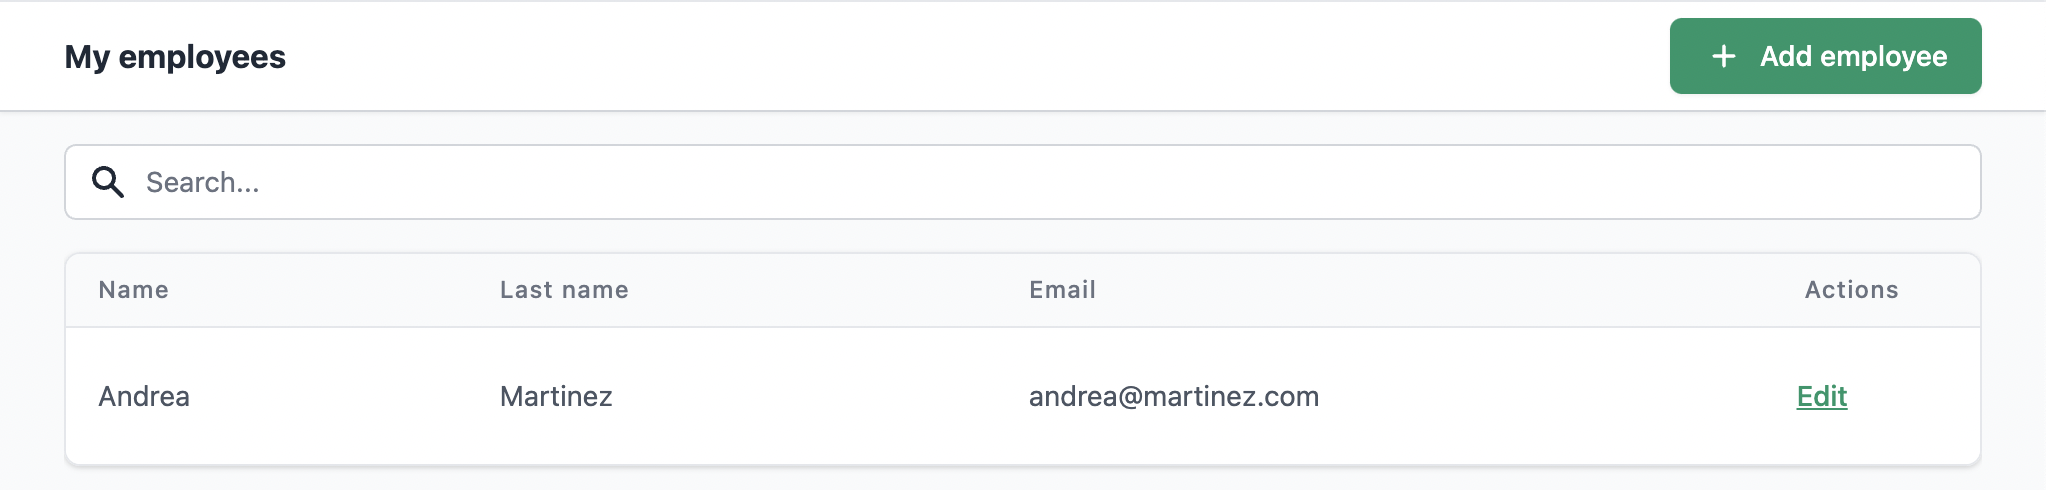
Verify that the Employee is created on the database:
select * from "Employees";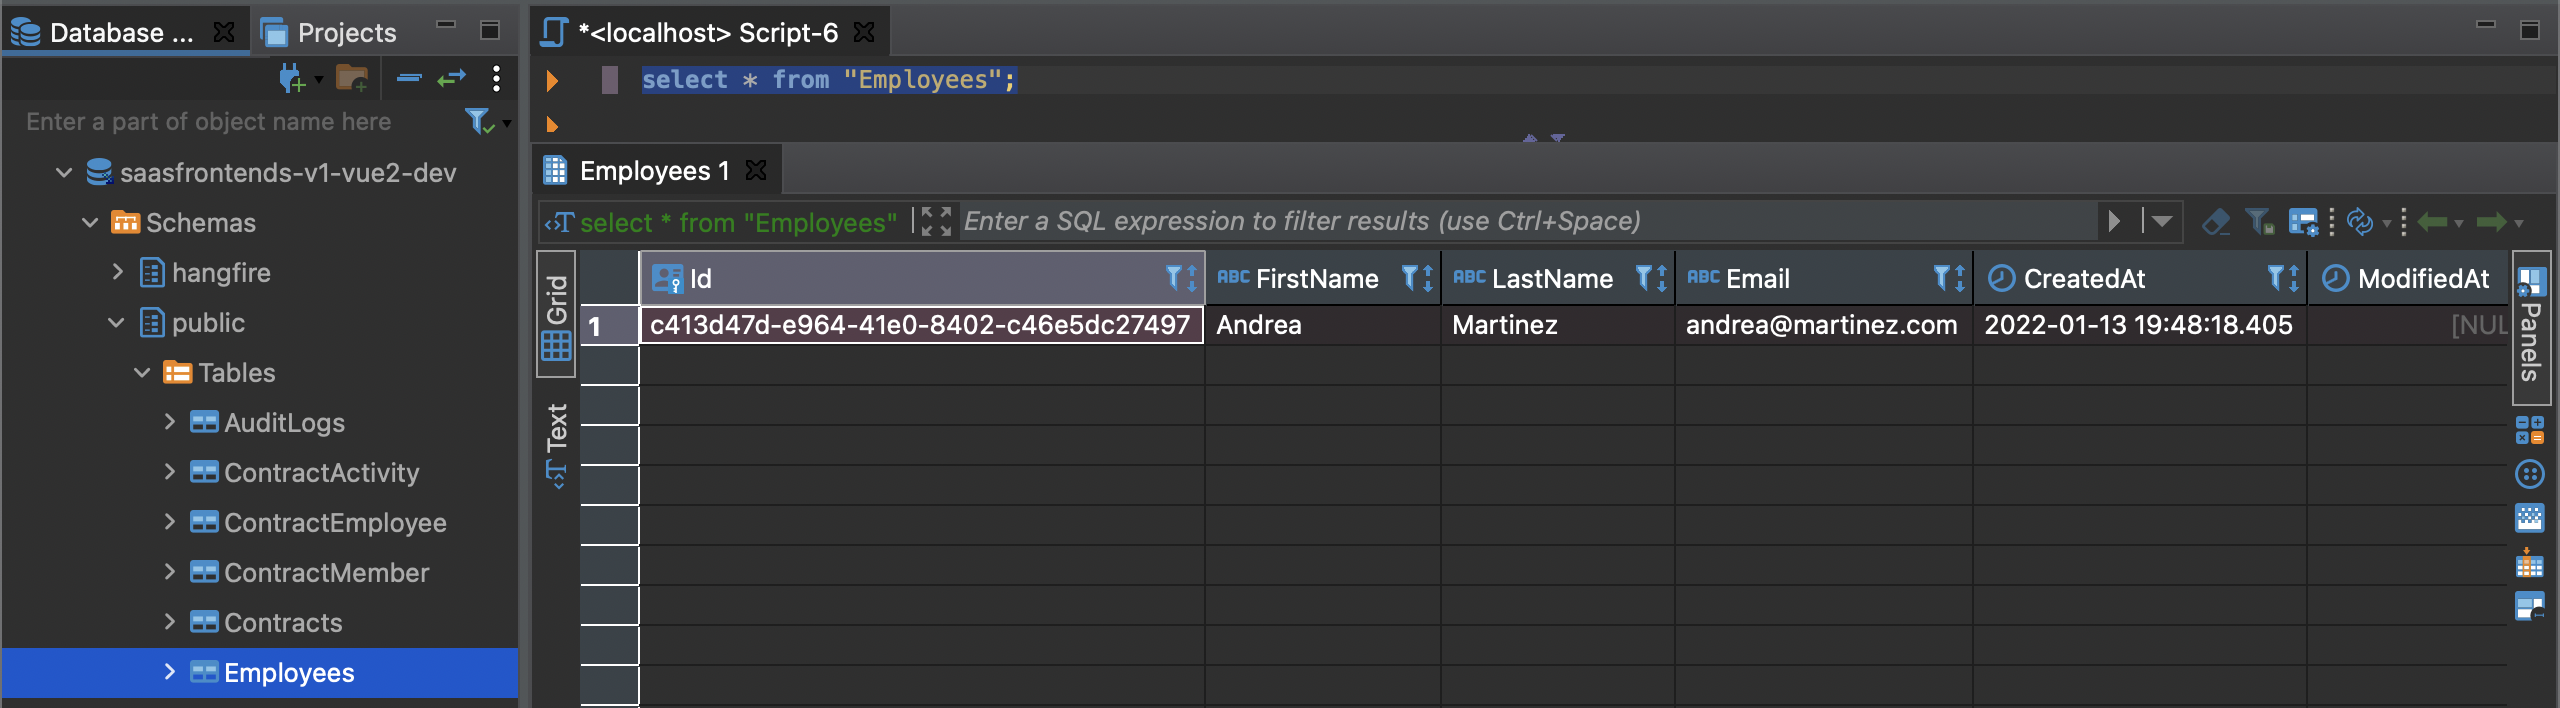
Links
A Link is a core concept of SaasFrontends. It allow your users (tenants) to create links between them.
In this sample app, a Link consists of the Client and the Provider. Either of them can create a share a Contract with the other.
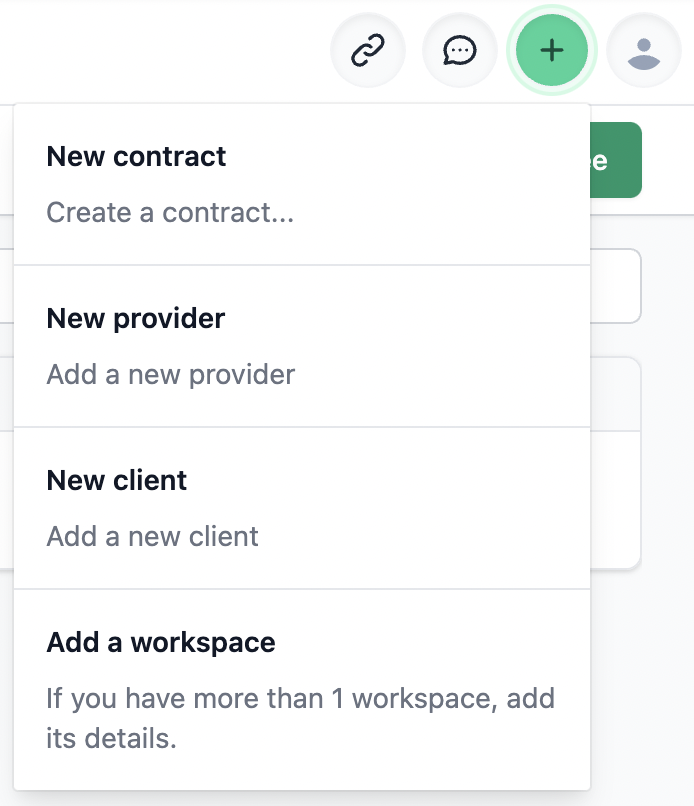
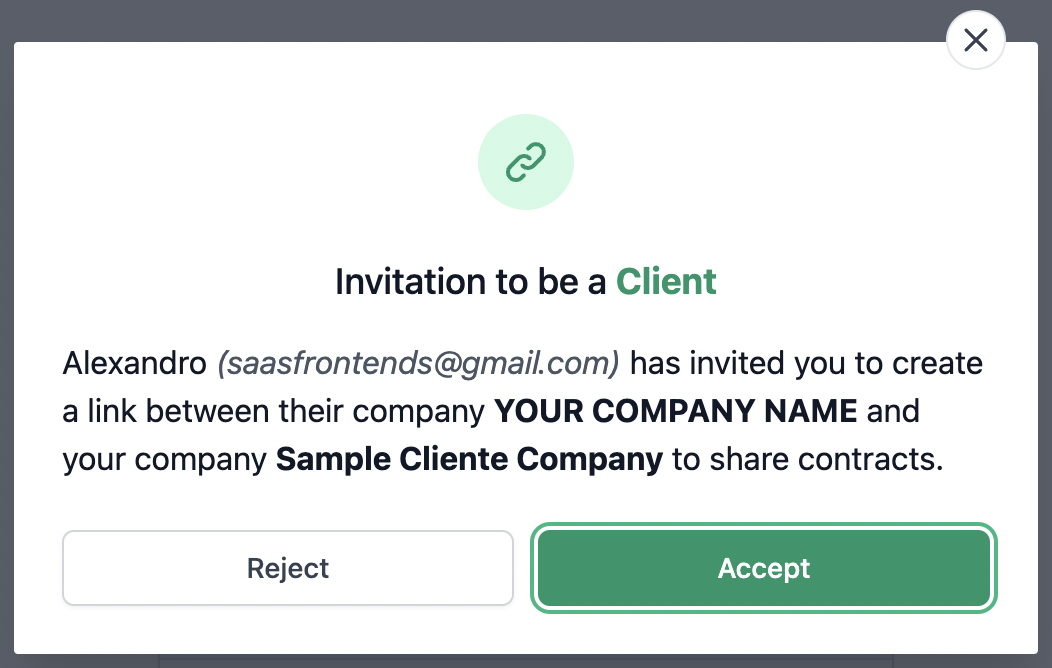
Invite a user as your Client
Click on the Plus button on the top right corner and Click on the “New Client” option.
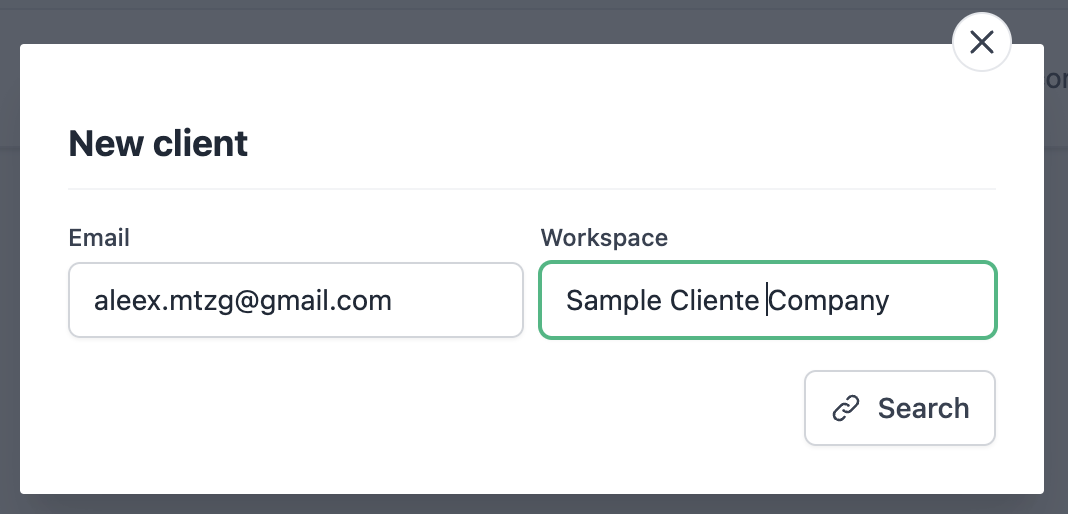
Invite your ‘client’:
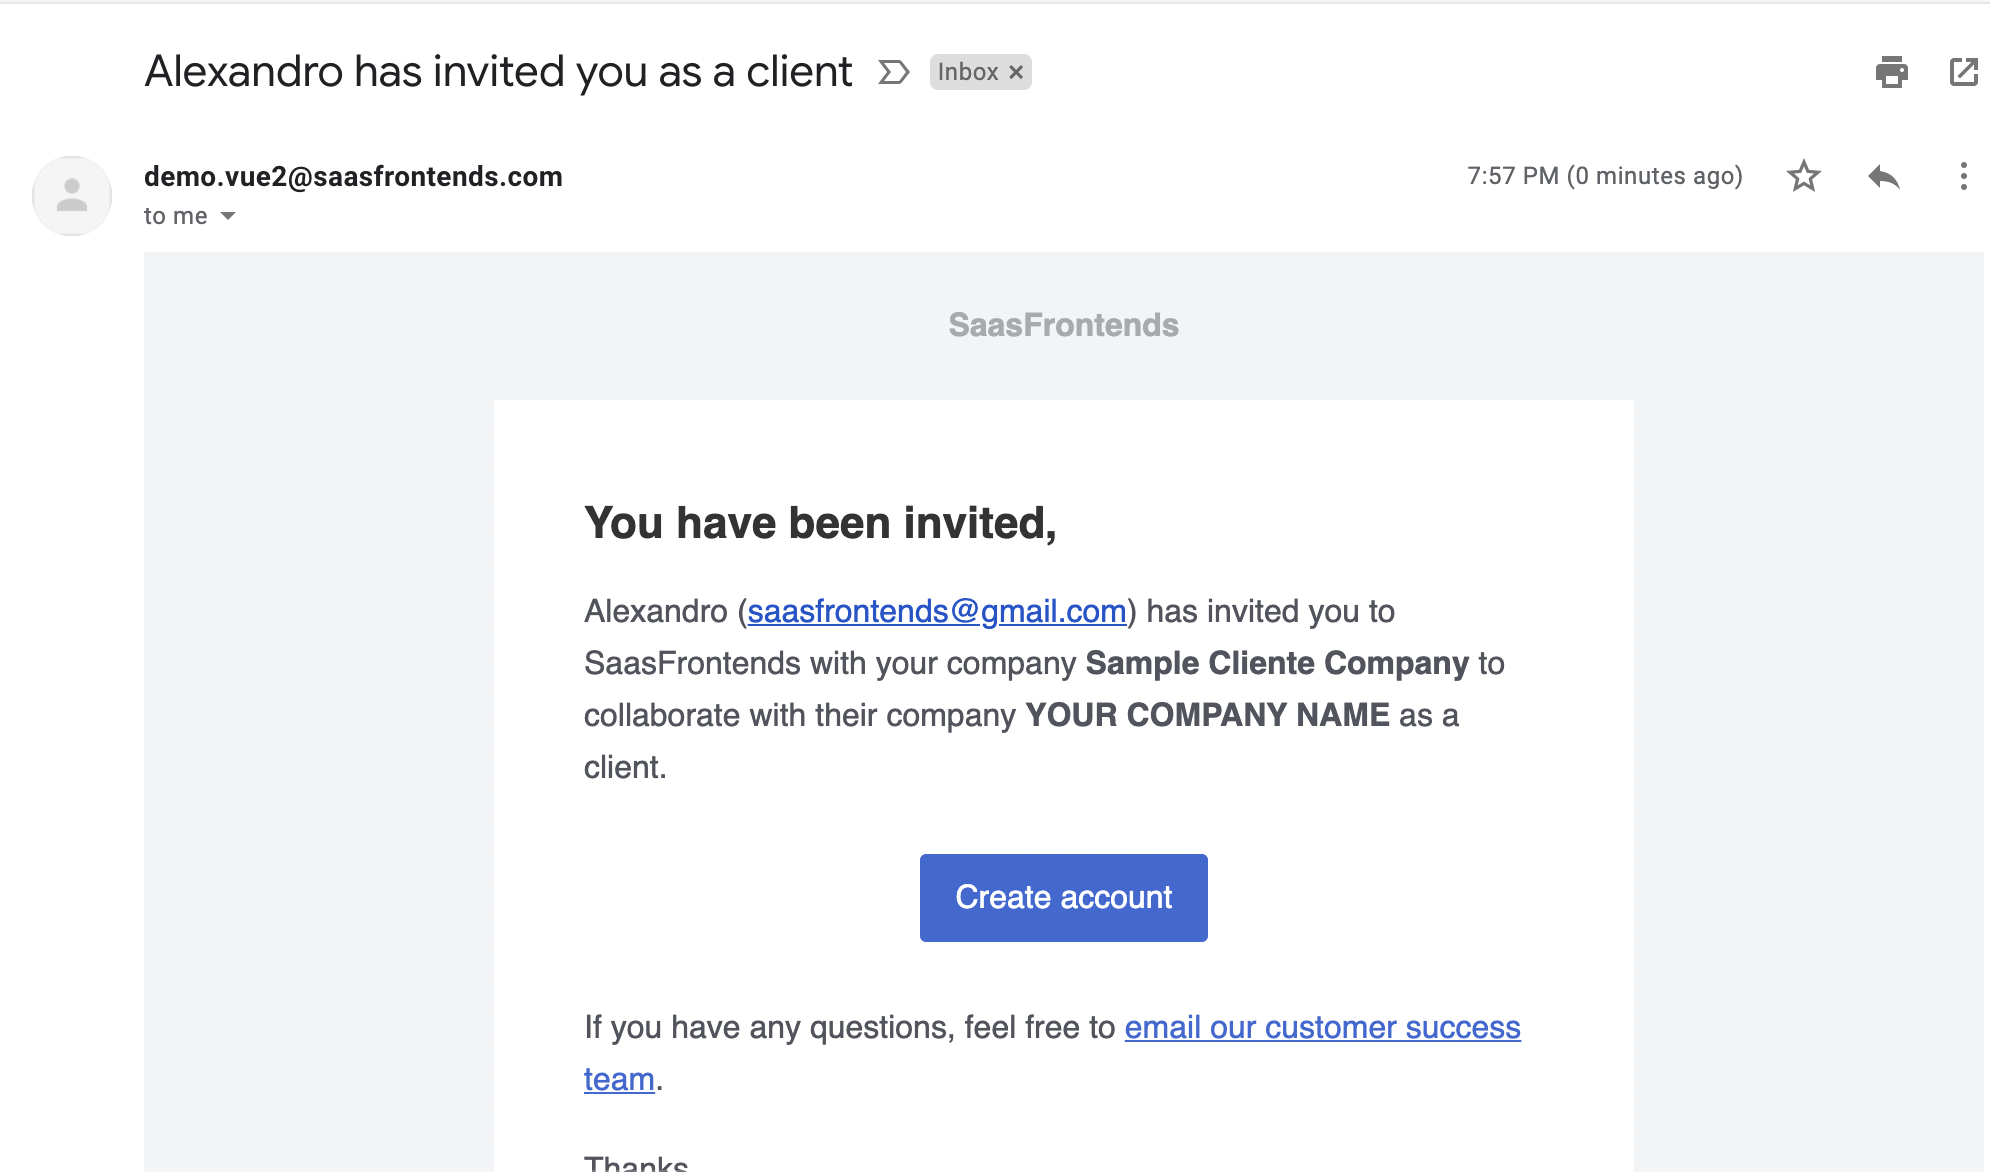
Check your inbox, you should get an invitation to join:
Click on the “Create account” button, it will redirect you to create an account. I’ll be selecting a Free plan.
It should redirect you to the /app/dashboard. Log out, and Log in as the previously created user (on Step 8).
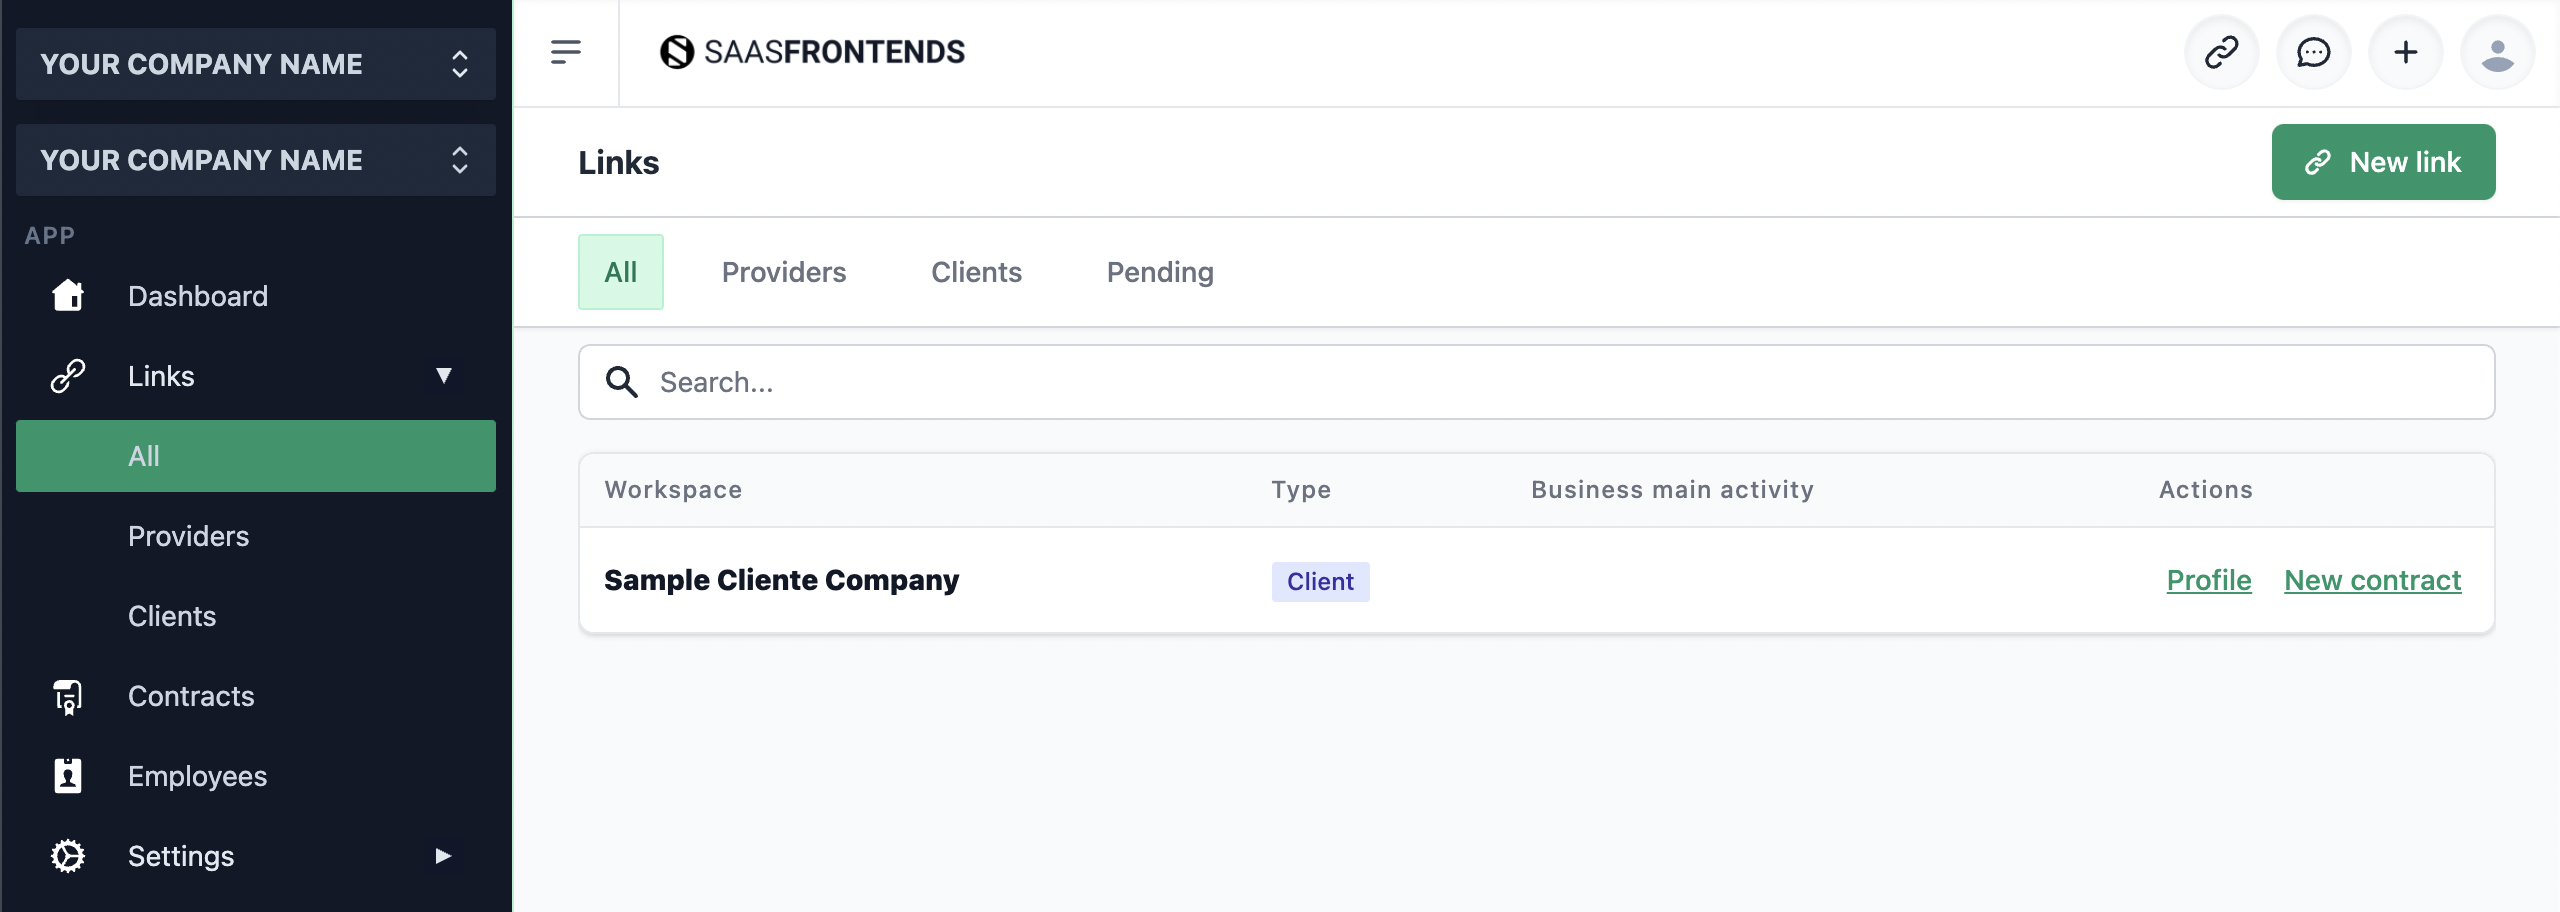
Verify the created Link
Click on the Links -> All sidebar item. There should your ‘client’.
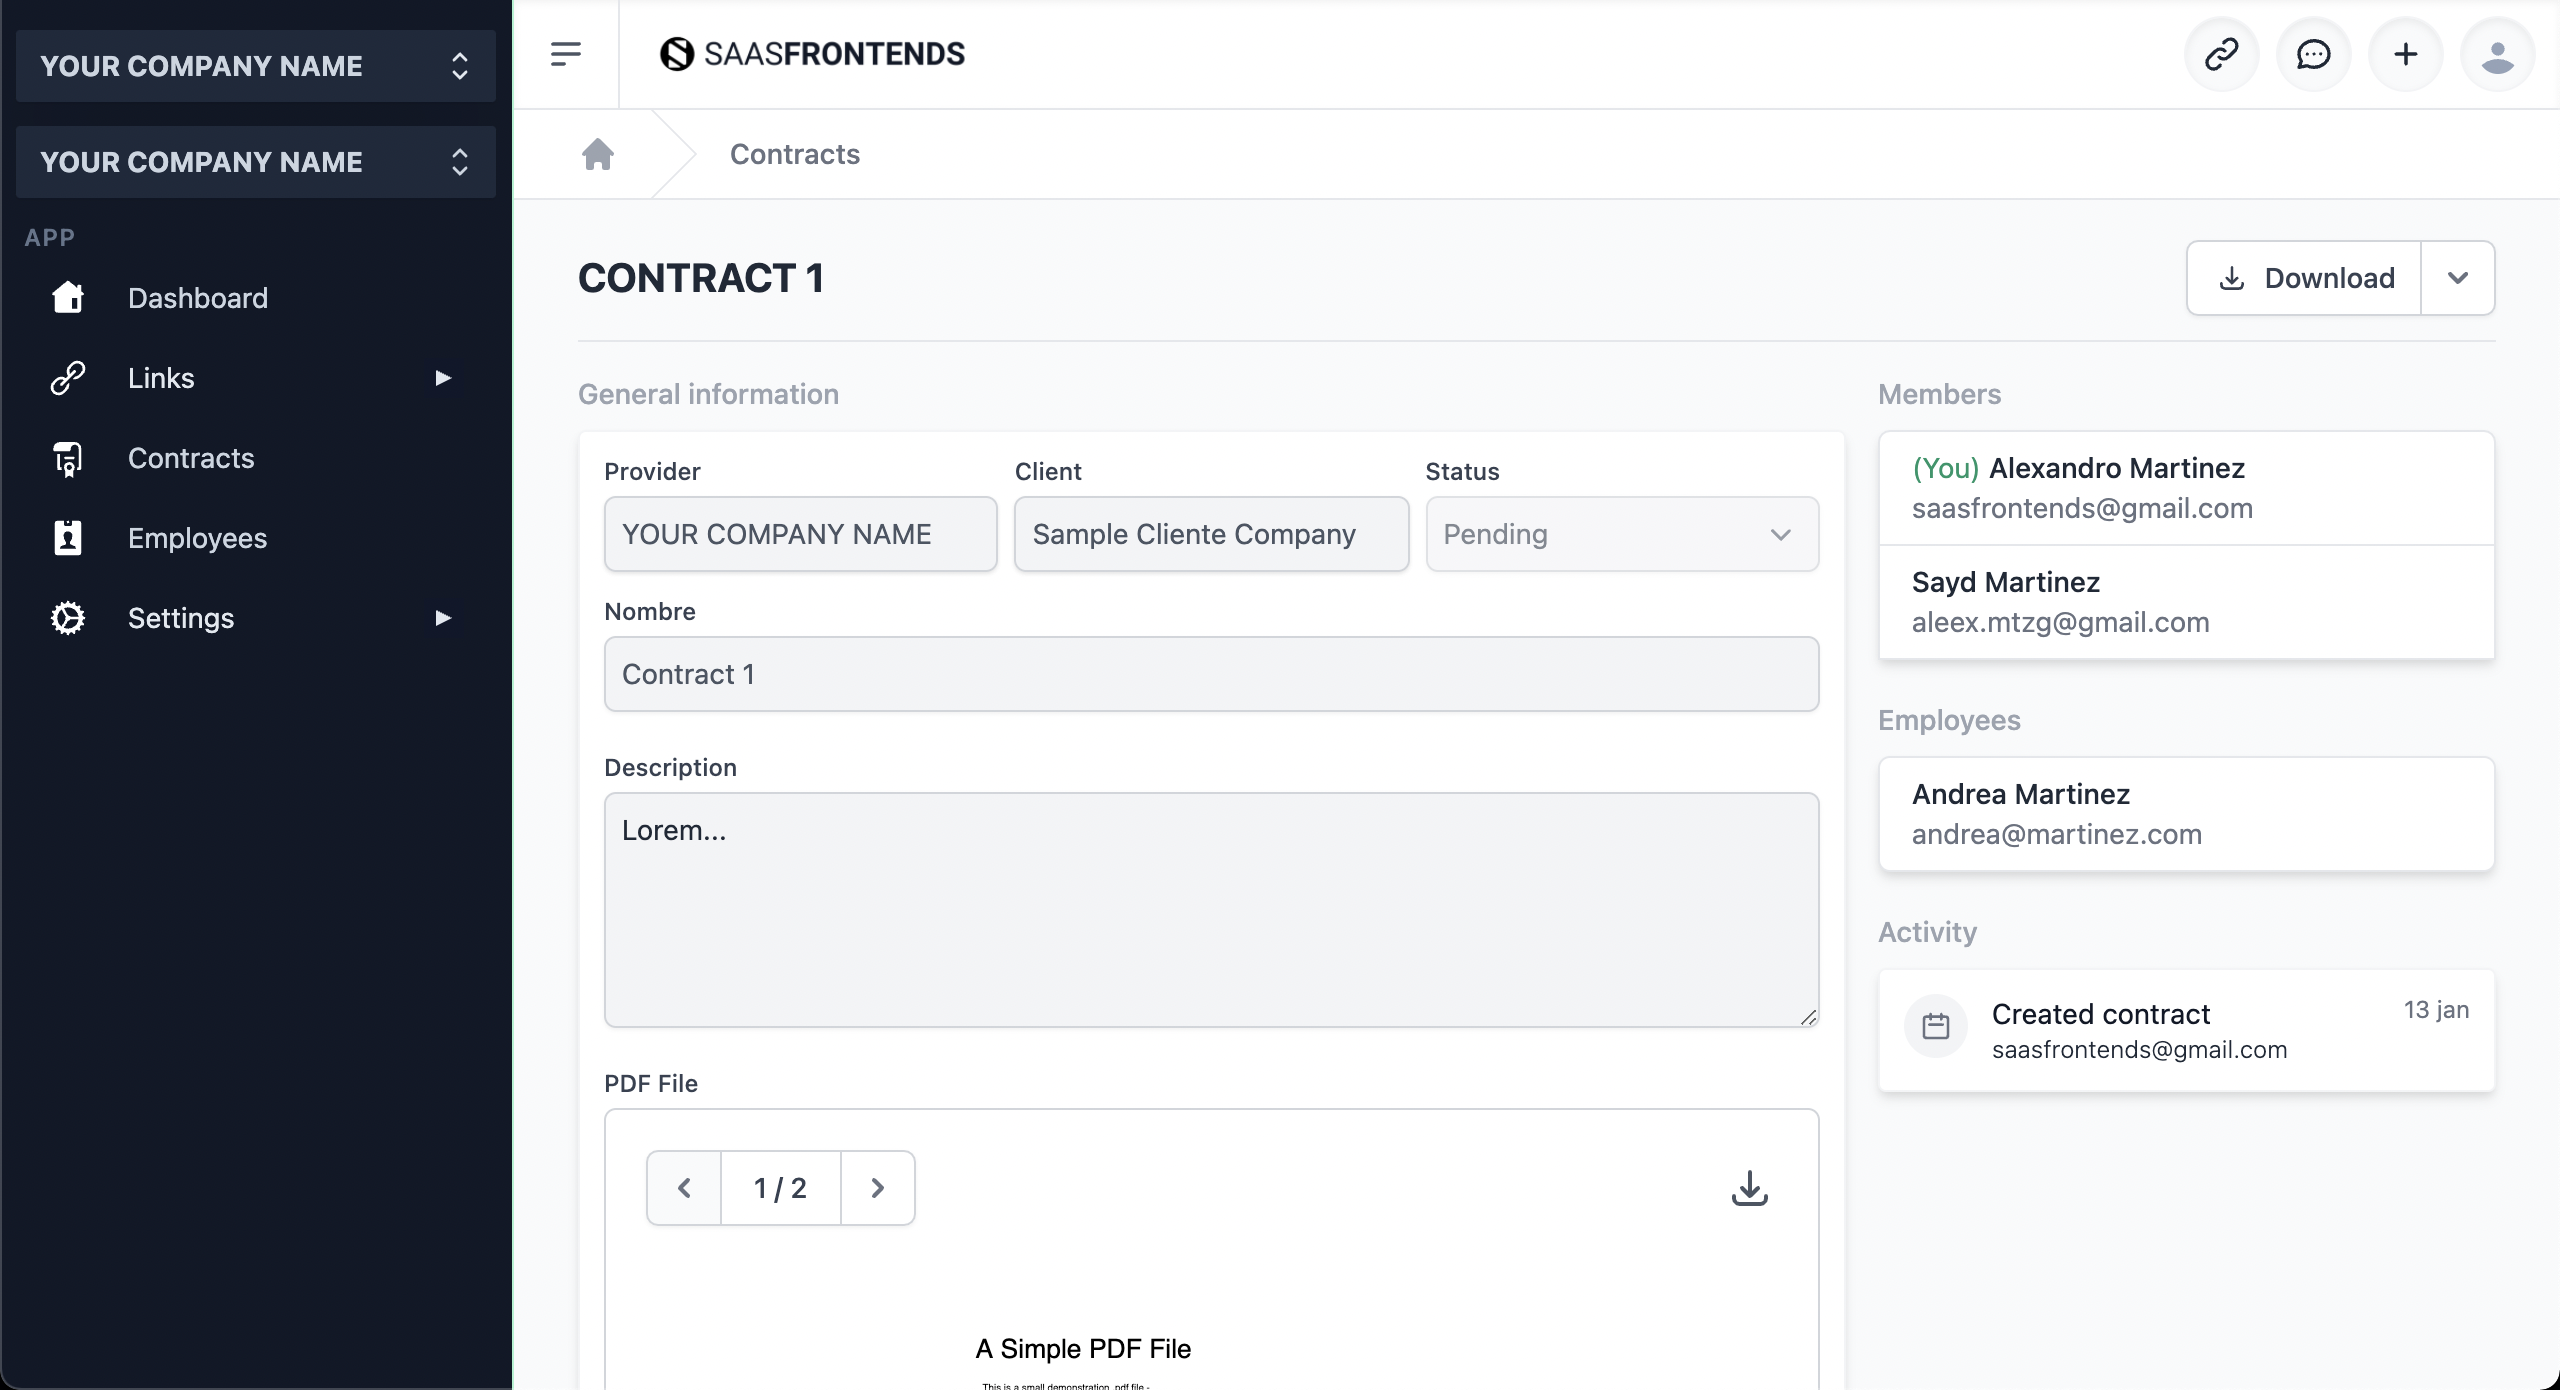
Contracts
Click on New contract, and create a sample contract. Once created, it will redirect you to view the contract details:
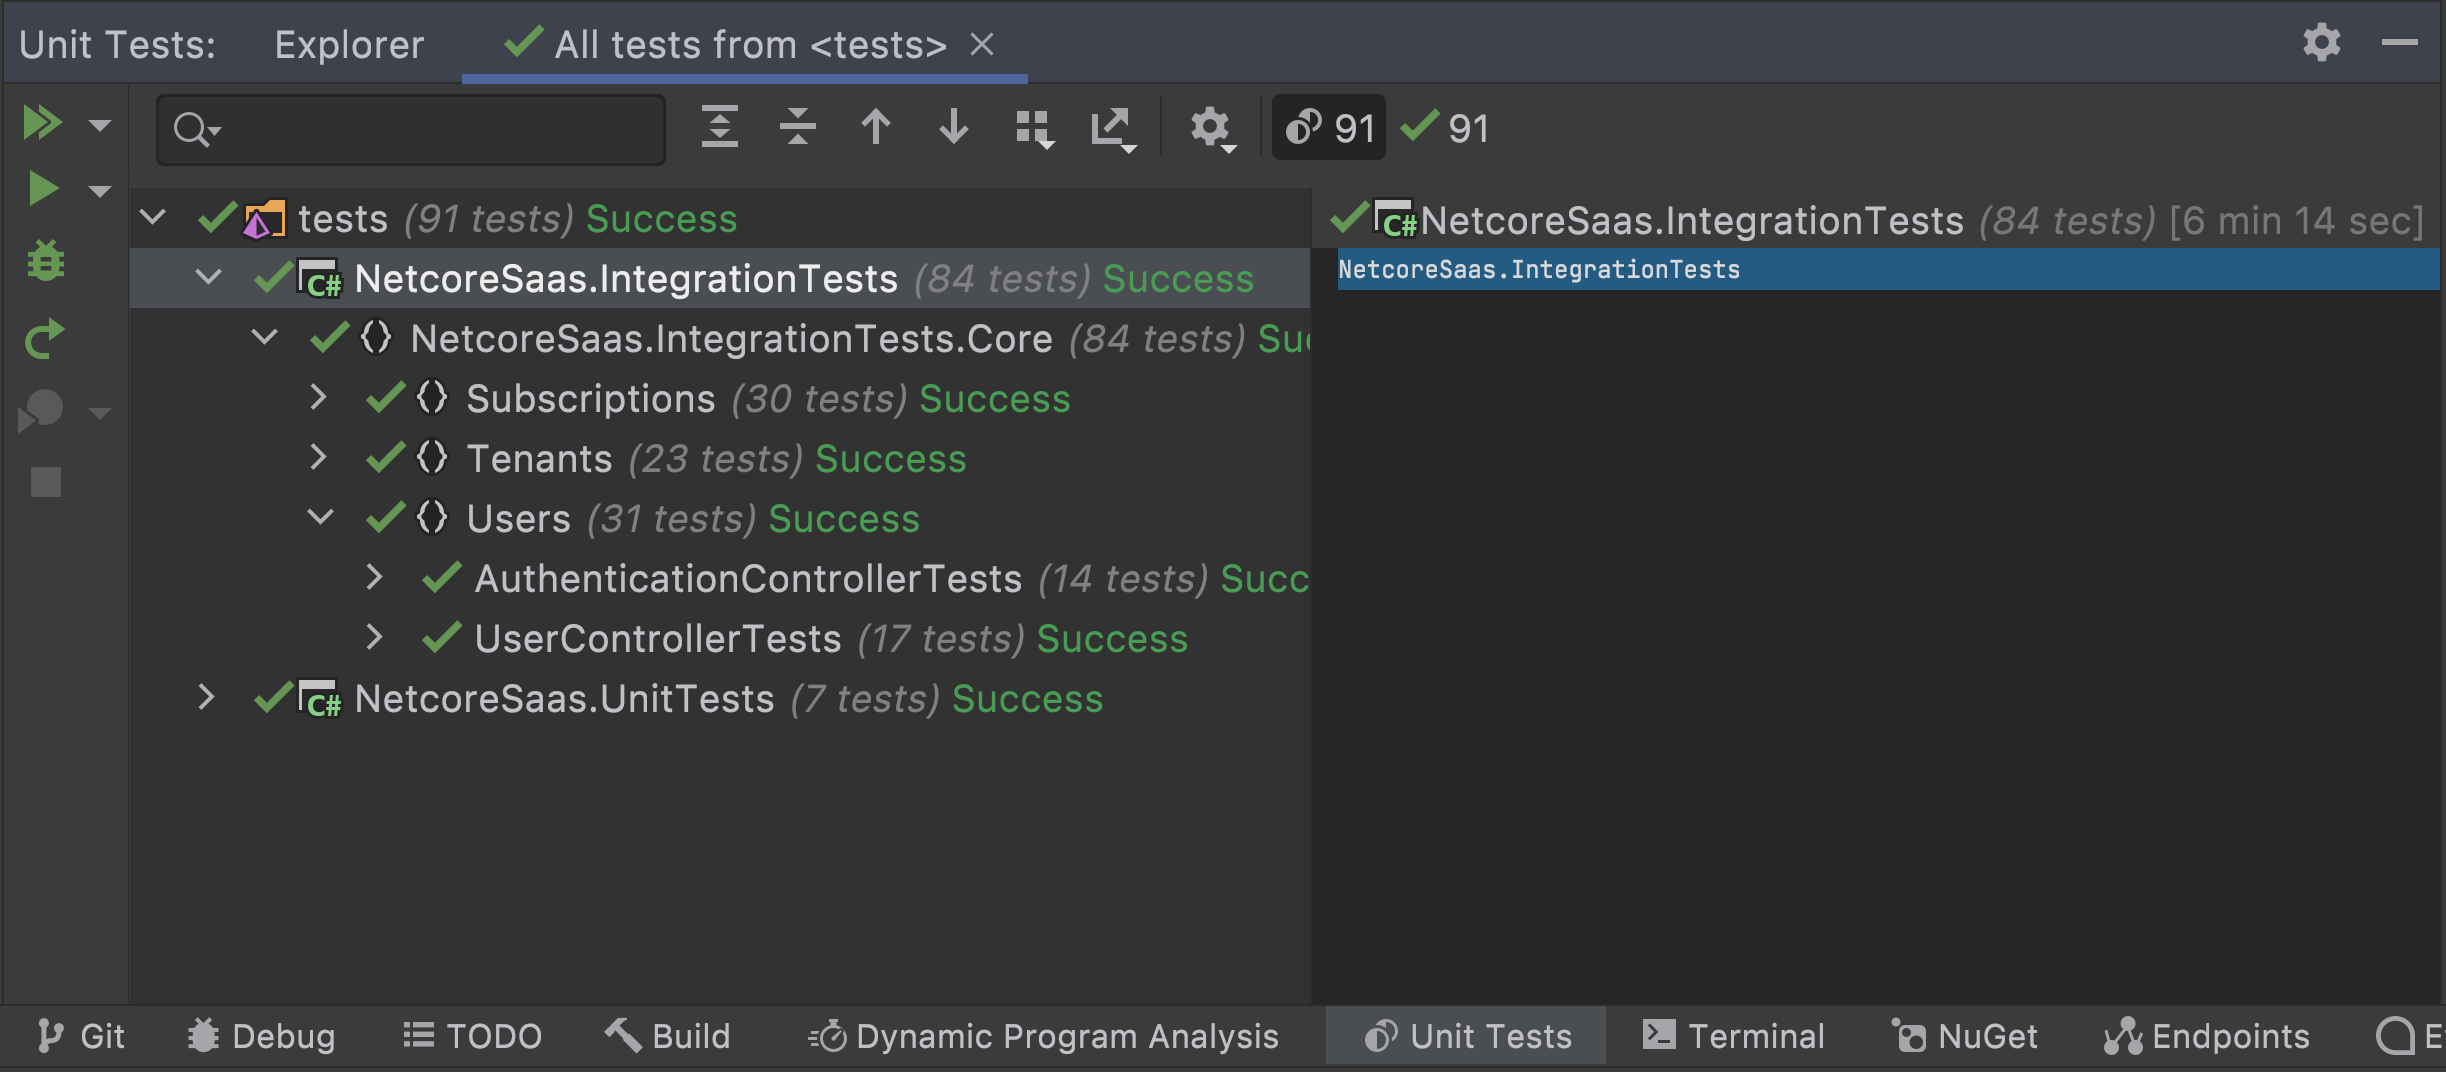
Step 10: Integration Tests
Stop the application and go to the Unit Tests tab:

Right click on the “tests” folder and click “Run Selected Unit Tests”.
All 91 tests should pass:
—
Please let me know if you have any questions.
